
This fabric covered, shabby chic sewing basket stole my heart when I saw it at an estate sale last year! As I recall, just about everything at that sale was out-of-reach-expensive, except the sewing basket. As it was only $2, I snapped it up, knowing it was in less than perfect condition…waayyy less than perfect if you know what I mean. But it was still cute as a button…you could even s-a-a-y-y….
I Found a Treasure!

Before I go any further…
It’s time for the Monthly Craft Destash Challenge!
In my project, I’m merely scratching the surface of my huge doily stash. Keep reading to see what I did and why.
[clickToTweet tweet=”What crafty creations could you make today from YOUR craft stash?! #CraftRoomDestashChallenge” quote=”What crafty creations could you make today from YOUR craft stash?! #CraftRoomDestashChallenge”]
If you’d like to join in the Craft Room De-Stash Challenge, you can request to join our Facebook group here!
 Loading InLinkz ...
So This was a Treasure???
I decided to put it in my Vintage Southern Picks Etsy shop even though it had several issues, such as:
- one of the string handles was worn in two;
- the box was very faded,
- it was all over soiled,
- and it had an unsightly curling bottom rim problem, caused by exposure to moisture. (The box is cardboard.)
It had to go!

It Didn’t Sell But…
My box obviously didn’t sell, but it received many favorites, which encouraged me to attempt a makeover. I was a little leery of doing it because of the huge fail I had when trying to re-do another one I had a few years ago.
My main goal was to preserve what was here, not tear anything off. That was the big and bad last time. Tearing everything off literally tore the box apart, and like Humpty Dumpty, I couldn’t figure out how to put it all back together, LOL.
Process of Restoration
I tackled the bottom. First I wet the rim just a bit until it was damp, but not dripping wet.

I cut 2 pieces of thick cardboard to fit tightly inside the rim in order to push it outward, hopefully allowing it to dry straight. Fingers crossed.
![]()
Now look at that! I was thrilled my idea worked!

Next the woven rope handles needed to be replaced. I could have bought them new, but they would look new, and I needed them to look old. I still had the parts to the failed sewing box project. Maybe those ties would work!
And they did. They looked like they were made for it. I had my hubby do this part because sometimes I’m usually all thumbs.
OK, admit it, I was afraid to screw it up.

The lid also needed regluing…an easy fix, but wow, this box had more problems than I realized.

And the biggest problem was what to do next to preserve the charm, yet hide the fade and soiling as much as possible.
How I Used the Craft Stash
This is where the craft stash comes in. I decided to cover it strategically with doilies, which hopefully would take attention away from the fade and soiling, yet not cover the charming fabric completely.
I raided my huge stash of doilies to come up with a small pile.
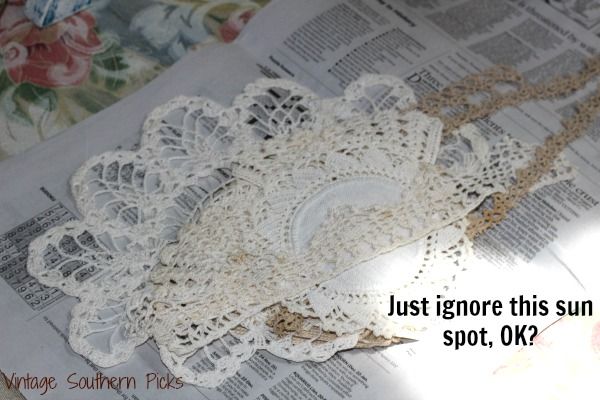
And this is the part that really makes me nervous…deciding on a design…where to start?

I placed doilies this way and that.
In exasperation, I told myself …”JUST DO IT!”
You don’t need any fancy glue by the way. Ordinary Elmer’s Glue works just fine.
![]()
Starting with the lid, I centered the doily on it. It’s actually half a butterfly, but did you know this crochet pattern is known as a “pineapple” because all the parts of it are in the shape of one?
![]()
Evenly apply dots of glue.

I used vintage coasters and bits of crochet trim.

See those 3 green floral things to the right up above? If you’re new here, you can read how I turned those boring clear glass candle holders into vases.
I was delighted to find the square crochet coasters at a yard sale years ago.

And here’s the finished box! And since I have a ton of vintage buttons, I used a few on both sides as little accents.

All in all, I’m pretty pleased with how it turned out! Such an improvement over the original, don’t you think?
But if I had it to do over….thinking I might dye those doilies so they don’t look so white.
See that measuring tape? Even that’s vintage! I remember my mama using it all the time, but we won’t say…ahem…how old…
And if you’re curious about that picture in the right background, there’s a story to that too! I made the frame out of some curious found junk.
Do you like shabby chic? Have you restored any sewing boxes? I’d love to hear about it in the comments!
Be sure to drop by the other projects in the link up…you’ll come away inspired!
Sharing with these Link Parties….
PLEASE PIN Y’ALL!

Other shabby chic posts you may enjoy….


Florence
Latest posts by Florence (see all)
- The Latest Vintage Hauls - February 10, 2020
- A Vintage Fall Haul - November 3, 2019
- September Sales on Etsy and My New Antique Booth - September 30, 2019
- Camping Trip Thrift Store Haul - August 2, 2019
How clever! I didn’t notice the doilies being brighter but I wonder if you could moisten a cloth with tea and dab it on the doilies to make them look less bright?
Thanks Wanda. That’s a great idea to see if I can do a little dyeing now even though they’re glued on. It might work.
You are crafty, indeed. I love the way you fixed the bottom. I will have to remember that trick!!
Well thanks Kim! Glad I was able to inspire you. I didn’t know if it would work, but I’m so glad it did.
Florence that was a great save of the sewing basket. I bet you’ll be able to sell it in no time. I think your doilies are so pretty. I left all of mine in Greece and now I am actually missing them. The cute buttons also add a lot to this project.
Thanks so much Mary. Aww, I bet you do miss your doilies, or you could pick more up at yard sales I bet. They are so satisfying to work with when doing projects like this.
Yes the answer is to tea dye the doilies. I have a smallish wooden sewing box that needs work and haven’t figured out what to do as yet, this may inspire me.
Thanks Kathleen. I know you’re right. I’ll have to figure out how to dye them now that they’re glued on. Hope this will inspire you to work on your sewing box. I’d love to see a photo if you do!
I love doilies! Smart use of them on this project!
Thank you so much Julie!
Oooh, I like this sewing box upcycle project a lot, Florence!!! Super cute! Of course I pinned it to my Crafts and Sewing board for you and our readers. 🙂 I think this was a great redo and makes it usable without being dated and I love these older cardboard boxes for their storage.
Beautiful!
Hugs,
Barb 🙂
Thank you so much Barb! I appreciate your kind words. Thank you for pinning!
Nice work. I have some of these materials so now I know what to get started on 🙂
Thanks Deborah! I appreciate you stopping by.
This project is so darling. I like the addition of the doilies and buttons. It adds so much vintage charm to the sewing box. It is sure to sell now unless you decide to keep it.
Thank you Debra! I’m so glad you like it.
Hello Florence,
I hope it was alright to link in with the Craft De-Stash Challenge ~ I think I signed up on Facebook about 6 months ago but forget about linking up. I did manage to post an older post of mine about making Tea Towels. I’ll finish updating it. 🙂
Enjoyed your post about the sweet sewing box upcycle,
Hugs,
Barb 🙂
Thanks again Barb! Glad you linked up with us!
I see similar sewing boxes at the antique mall all the time. Great idea to “doll” it up with the doilies!!!
Thanks Pam! I’m liking it! Thanks for dropping in.
Love the tip around fixing the bottom; I was sure you were going to use a dinner plate that was exactly the same size-probably impossible to find! I am going to remember this tip when I try to re-round some hat boxes I have. I think in 10-15 years, the doilies will have dimmed down to an off-white so not to worry! I think I am saving my tea-dying experiment to cover stains on some doilies I have! Thank you for the step by step pictures and instruction; I am a visual person and it makes it so much easier for me to SEE how to do it.
Thanks Kathy. I appreciate your sweet comments. Yes the right size dinner plate would be hard to find. I have used your tea-dyeing trick to
“fix” other things I have that were stained. It worked like a charm too. Glad the post was of help to you!
Looks great, Florence. You can never have too many pretty boxes to store treasures in.
Pinning. 😉
Thanks so much Stacey!
You have certainly saved a treasure. These are hard to find these days and you will be glad you saved it from the dumpster. Thanks for sharing a great project.
Thank you Donna! I appreciate those kind words!
What a lovely makeover for your vintage sewing box!
Thank you Roseann!
Florence, I love your use of the vintage doilies on the sewing box. They added the perfect vintage touch. You always come up with the greatest ideas.
Thanks Sharon! You’ve just made my day with that sweet comment! Thanks for dropping by.
I live the doilies on this sewing box. They are the perfect addition to this shabby chic look, vintage charm all the way!
Thanks so much Nancy! I appreciate your sweet comment.
What a great make over and a great way to use up your stash.
Thanks Amy!
I love that you took the time to rescue that precious Little box, Florence! Also, I’m proud of you that you gave it a try even you had a Little mishap with another one before. I love your work and I certainly do love vintage.
Thank you sweet Habiba! I appreciate your comment & for dropping in.
You did this vintage find some serious justice! I could see where you might want less white doilies, but I don’t think it detracts at all!
Thanks so much Megan! I appreciate your comment!
Ahhh Florence, you did good my friend. It looks lovely and not so worn out and tired anymore. I’ve never tried redoing a old sewing basket, in fact I don’t think I’ve ever seen one that looks like yours, but adding the doily’s and buttons makes it so much more like a sewing basket. It fits the whole theme just right
Thanks Michelle! I appreciate your sweet and thoughtful comment!
Thank you for sharing at the To Grandma’s House We Go DIY, Crafts, Recipes and More link party! Pinned!
Thank you Sheri! I appreciate the pin too!
Florence,
You took what was already a treasure and made it into something to be treasured even more!!!
fantastic job!!
Thanks so much for stopping by and for taking the time to comment!!
Hugs,
Debbie
Thank you Debbie! I appreciate you dropping in too!
What a beautiful transformation! I have a doily collection, too, and an old sewing box from an aunt…..who knows, I might just try this! Thanks for sharing at Vintage Charm! xo Kathleen
Thank you Kathleen! I appreciate your comment!
What a cute little sewing box Florence! I love shabby chic, and you did a wonderful job on the box. It looks so much cuter now. I bet it sells in no time at all now!
Thanks so much Linda! I sure hope it does. I appreciate your comment!