• Home
  • About
    • About Me
    • Contact Me
  • Etsy Shop
  • Link Parties/Featured
    • I’ve Been Featured
    • Sweet Inspiration Link Party
  • Personal Diary

Vintage Southern Picks

Cheapskate Picker Sharing Finds, DIY & Selling Tips

Facebook   Twitter   Pinterest   Google+   RSS
  • DIY Projects
    • DIYs to Sell
    • Holiday/Seasonal
    • Home and Garden DIY
  • Home and Garden
    • Home Organization
    • How I Organize My Ebay/Etsy Home Office
    • Home Tours
    • Party Games
  • Selling Tips
    • Buys I Avoid
    • Shipping
    • What’s Selling on Etsy/Ebay
    • Yard Sales
      • How to Give a Yard Sale
      • What Not to Say in Yard Sale Ads
      • Yard Sale Humor
  • Vintage Finds
    • Thrift Store Finds
    • Mystery Items
    • Yard/Estate Sale Finds
    • Vintage Junk Giveaways
  • Disclosure Policy
  • Privacy Policy

When Chalk Paint Won’t Work, Try Gesso!

April 26, 2018 by Florence 28 Comments

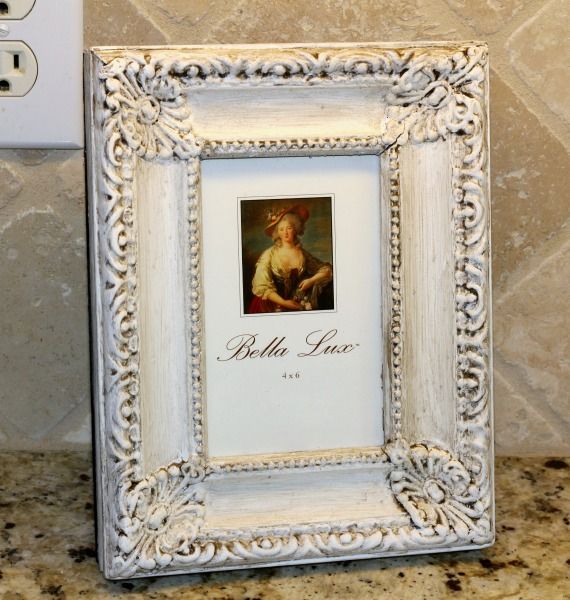
I found a cute vintage style frame for 99¢ at a thrift store, and really liked those raised details! I wanted to bring them out with farmhouse highlights. I’m actually working with 2 frames in this post, so keep reading to the end.

ornate-picture-frame

The plan was to paint it first with black, then follow with white and distress so the black would show through…my project for the Monthly Thrift Store Upcycle Challenge.

I’m always looking for an easier way to get the look I love, rather than always chalk paint and dark wax, which I don’t like working with.

Learn more about the Thrift Store Upcycle Challenge below

The Thrift Store Upcycle Challenge

We bloggers challenge each other to create something from a thrift store find. It can be anything! We can spend any amount to create our own respective masterpieces. Other than the cost of the 2 frames ($2.98), I had everything else on hand.

The Rules:

    • Upcycle an item(s) from a thrift store, resale store, or garage sale into a new piece of decor.


    • There’s no monthly theme.


  • There’s no budget to stick to.

Meet the Hosts

Angela | Simply Beautiful by Angela
Jennifer | Cookies Coffee and Crafts – Michelle | Our Crafty Mom 
Deborah | Salvage Sister & Mister – Pam | P.S. I Love You Crafts
Gail | Purple Hues and Me – Ann | Duct Tape and Denim
Pili | My Sweet Things – Denise | My Thrifty House
Victoria | Dazzle While Frazzled – Chelc | Inside the Fox Den
Michelle | Michelle James Design – Marie | The Inspiration Vault
Yami | The Latina Next Door – Florence | Vintage Southern Picks
Debra | Shoppe No. 5 – Kathleen | Our Hopeful Home
Deborah | Salvage Sister & Mister
Make sure you follow our board on Pinterest for more upcycled decor inspiration!

Back to the Frame Project~

My usual method is to sand a bit first to minimize any glossiness, but I discovered the frame wasn’t wood, but possibly resin. After applying 2 coats of black spray paint, it didn’t seem to be sticking very well. I was positive I let it dry long enough.

Yes, that sucker dried for 2 whole days, but when I barely touched it, the paint peeled right off. UGH! I felt like tossing it in the trash, but I don’t give up so easily.

Well really, I think it’s because I spent money on it, so it’s not going in the trash!

Frame messed up and paint not sticking

I sanded a bit to see if any more paint would come off. I didn’t want more layers lifting off with whatever I might put on top of it. I’m not sure why it wouldn’t stick. After all, chalk paint sticks to everything right?

Since I had just been reading about Gesso, I decided to give it a try. I already had it on hand from another project I’d done some time ago, but it landed in the back of all my paints and I forgot about it. I was ready to experiment with it again.

Bottle of Gesso

What is Gesso?

If you haven’t tried Gesso before, it comes in white, black, and gray, in various size bottles, and is found in the artist’s paint section of craft stores. Artists use it to prime their canvases, but it can also be used as paint or as a paint supplement. You can water it down and use as a wash, or use it full strength from the bottle. You can mix it with paint, as I decided to do here.

Ways to Mix It~

No rocket science, I just poured a little Gesso into a plastic pudding cup I was using…maybe a tablespoon, then added another tablespoon of white chalk paint. I’m estimating…I truly didn’t measure anything. Then I applied it to the frame with a narrow bristle brush.

I was hoping it would stick, but I was prepared for the worst.

Success! I don’t have a photo of it dressed in white, but it worked.

What I totally love is how the beautiful  highlighting effects on the details were achieved!

Picture frame with mixed Gesso and white paint

Are these not beautiful?

Details of picture with frame with highlights

details of picture frame with highlights

An Easy Way to Highlight

I found a product giving these wonderful effects…Dixie Bell Grunge Glaze. I’m not being paid to say it either…I just like the product. I like it much better than using Annie Sloan’s Dark Wax because my fingers don’t come in contact with the material at all, and I don’t get that sticky, messy feel. A little goes a long way too.

Dixie Belle Grunge Glaze

If you decide to try it, don’t be taken aback by the color when you open the jar. It looks light gray like this. But it dries a delicious dark brown…just the way I like it!

how grunge glaze looks in the jar

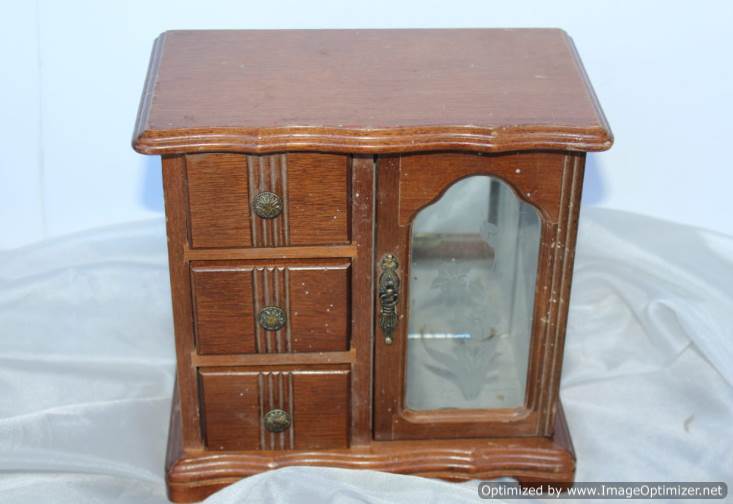
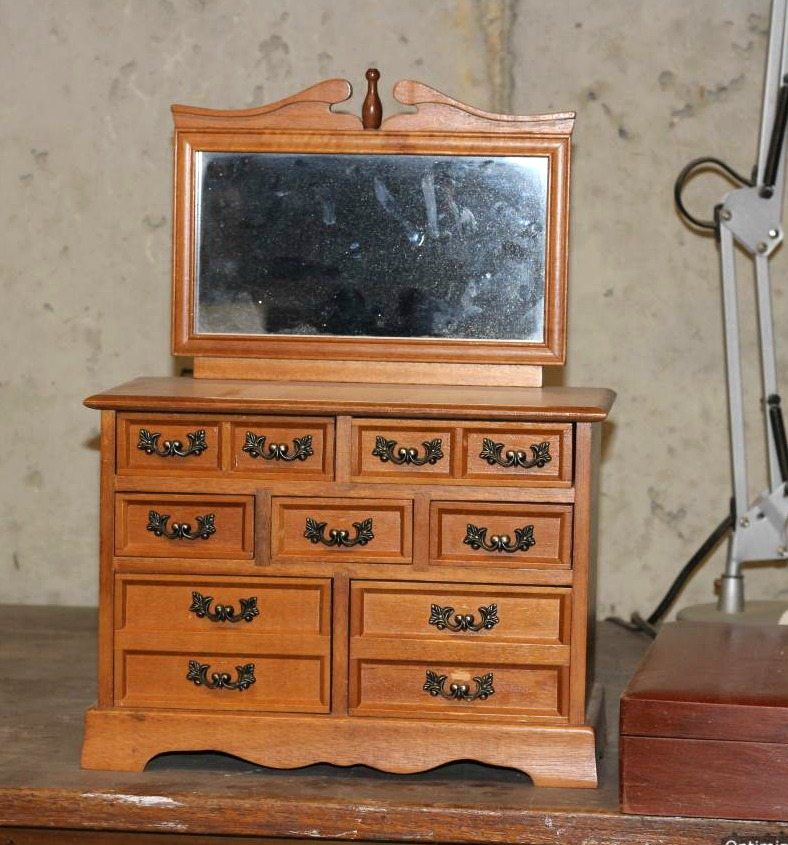
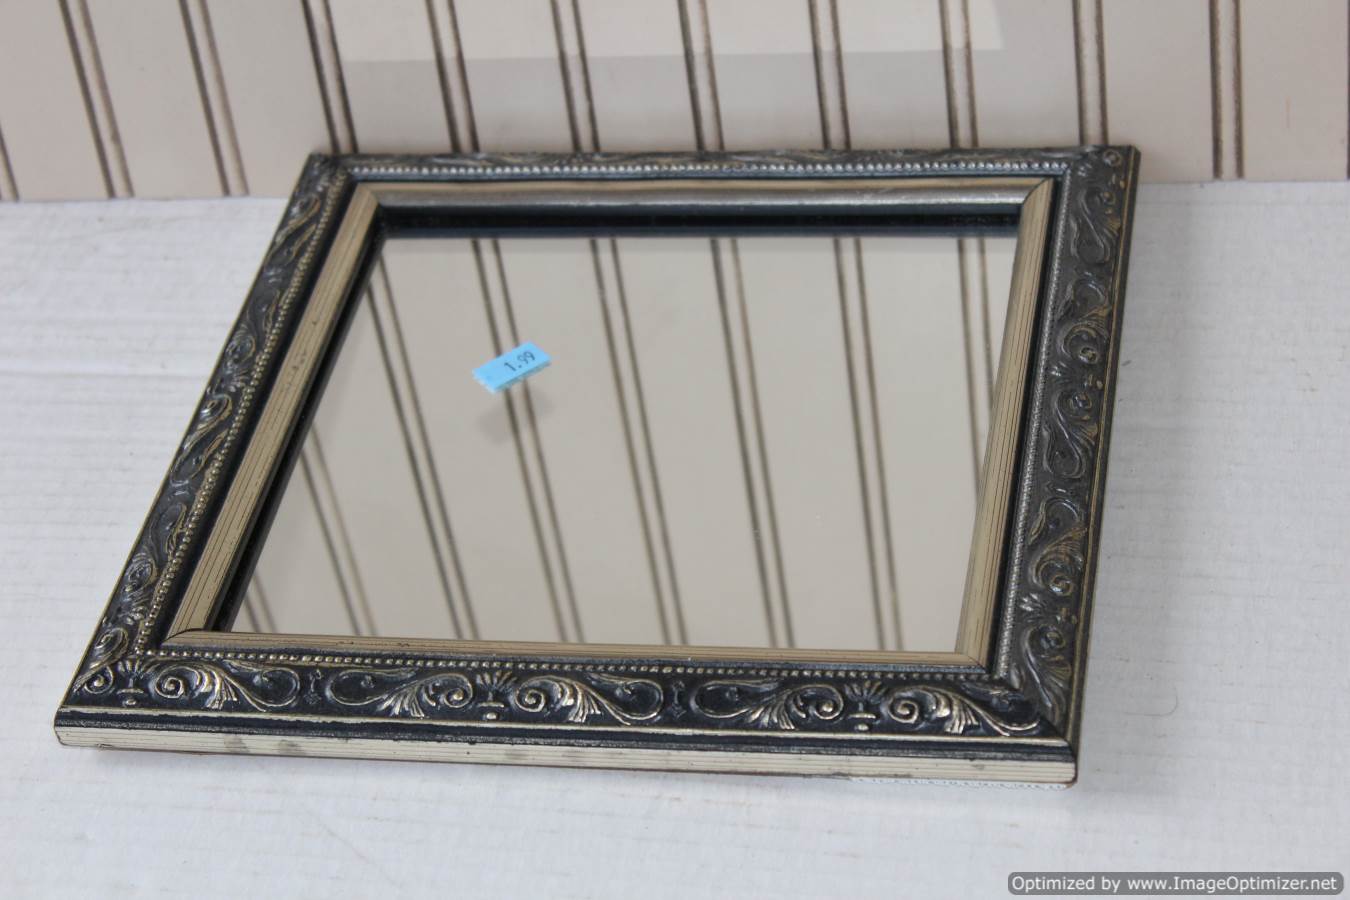
The Second Frame is Really a Tray

Here’s the second $1.99 thrift store frame I experimented with, and it looks pretty good on its own, I admit, but I wanted a different look. No hanger on the back, so it could be a tray.

I alternated my Gesso/paint mix with Grunge Glaze in several layers, and used a light layer of Annie Sloan Duck Egg in between. I’m trying to decide if I want to highlight with Rub n Buff gold. I’m hesitating because if I don’t like it, I’ll have to start over.

I could fake it and say I’m crazy about the second look. I’m not. I think it’s missing something. I’ll continue to experiment as time goes on, but I love look #1!

I hope I’ve encouraged you to experiment with Gesso and Dixie Belle’s Grunge Glaze. It’s a nice alternative to dark wax.


And now for more thrifty goodness!

Check out what my fellow upcyclers created below!

An InLinkz Link-up


Filed Under: DIYs to Sell Tagged With: beautiful effects on a picture frame, chalk paint and gesso, good alternative for dark wax, highlighting a picture frame tray, highlighting a picture frame with glaze, refurbishing a picture frame, refurbishing thrift store frames with paint gesso and grunge glaze, repainting a picture frame

Shabby Chic Sewing Basket Makeover (What to Do When Vintage is Less Than Perfect)

April 14, 2018 by Florence 48 Comments

This fabric covered, shabby chic sewing basket stole my heart when I saw it at an estate sale last year! As I recall, just about everything at that sale was out-of-reach-expensive, except the sewing basket. As it was only $2, I snapped it up, knowing it was in less than perfect condition…waayyy less than perfect if you know what I mean. But it was still cute as a button…you could even s-a-a-y-y….

I Found a Treasure!

shabby chic sewing basket

Before I go any further…

It’s time for the Monthly Craft Destash Challenge!

In my project, I’m merely scratching the surface of my huge doily stash. Keep reading to see what I did and why.

craft-room-destash-challenge

Every month a group of bloggers are challenged by C’mon Get Crafty to create a new craft or project from their own stash of goodies! Check out some awesome creations you might be able to make from your own stash! #CraftRoomDestashChallenge

[clickToTweet tweet=”What crafty creations could you make today from YOUR craft stash?! #CraftRoomDestashChallenge” quote=”What crafty creations could you make today from YOUR craft stash?! #CraftRoomDestashChallenge”]

If you’d like to join in the Craft Room De-Stash Challenge, you can request to join our Facebook group here!

 Loading InLinkz ...

So This was a Treasure???

I decided to put it in my Vintage Southern Picks Etsy shop even though it had several issues, such as:

  • one of the string handles was worn in two;
  • the box was very faded,
  • it was all over soiled,
  • and it had an unsightly curling bottom rim problem, caused by exposure to moisture. (The box is cardboard.)

It had to go!

the curling bottom rim of the box had to go
The curling bottom rim of the box

It Didn’t Sell But…

My box obviously didn’t sell, but it received many favorites, which encouraged me to attempt a makeover. I was a little leery of doing it because of the huge fail I had when trying to re-do another one I had a few years ago.

My main goal was to preserve what was here, not tear anything off. That was the big and bad last time. Tearing everything off literally tore the box apart, and like Humpty Dumpty, I couldn’t figure out how to put it all back together, LOL.

Process of Restoration

I tackled the bottom. First I wet the rim just a bit until it was damp, but not dripping wet.

I cut 2 pieces of thick cardboard to fit tightly inside the rim in order to push it outward, hopefully allowing it to dry straight. Fingers crossed.


2 oval cuts of cardboard

Now look at that! I was thrilled my idea worked!

the rim of the box was straight

Next the woven rope handles needed to be replaced. I could have bought them new, but they would look new, and I needed them to look old. I still had the parts to the failed sewing box project. Maybe those ties would work!

And they did. They looked like they were made for it. I had my hubby do this part because sometimes I’m usually all thumbs.

OK, admit it, I was afraid to screw it up.

replacing the rope handles
Notice how the top of the box shows how clean the fabric covering used to be!


The lid also needed regluing…an easy fix, but wow, this box had more problems than I realized.

the lid needed to be reglued

And the biggest problem was what to do next to preserve the charm, yet hide the fade and soiling as much as possible.

How I Used the Craft Stash

This is where the craft stash comes in. I decided to cover it strategically with doilies, which hopefully would take attention away from the fade and soiling, yet not cover the charming fabric completely.

I raided my huge stash of doilies to come up with a small pile.

pile of doilies stash

And this is the part that really makes me nervous…deciding on a design…where to start?

deciding on the design is the hardest part

I placed doilies this way and that.

In exasperation, I told myself …”JUST DO IT!”

You don’t need any fancy glue by the way. Ordinary Elmer’s Glue works just fine.

no fancy glue needed

Starting with the lid, I centered the doily on it. It’s actually half a butterfly, but did you know this crochet pattern is known as a “pineapple” because all the parts of it are in the shape of one?

starting with the lid

Evenly apply dots of glue.

all you need are dots of glue evenly applied

I used vintage coasters and bits of crochet trim.

I used coasters on the box

See those 3 green floral things to the right up above? If you’re new here, you can read how I turned those boring clear glass candle holders into vases.

I was delighted to find the square crochet coasters at a yard sale years ago.

side view of sewing basket

And here’s the finished box! And since I have a ton of vintage buttons, I used a few on both sides as little accents.

front view of restored sewing basket

All in all, I’m pretty pleased with how it turned out! Such an improvement over the original, don’t you think?

But if I had it to do over….thinking I might dye those doilies so they don’t look so white.

See that measuring tape? Even that’s vintage! I remember my mama using it all the time, but we won’t say…ahem…how old…

And if you’re curious about that picture in the right background, there’s a story to that too! I made the frame out of some curious found junk.

Do you like shabby chic? Have you restored any sewing boxes? I’d love to hear about it in the comments!

Be sure to drop by the other projects in the link up…you’ll come away inspired!

Sharing with these Link Parties….

PLEASE PIN Y’ALL!

Other shabby chic posts you may enjoy….

found-forgotten-junk-makes-a-sweet-vintage-vignette-featured-image


Filed Under: DIYs to Sell Tagged With: crochet trims help beautify a vintage sewing box, monthly craft destash challenge, sewing box makeover, shabby chic makeover of a vintage sewing box, using doilies to restore a shabby chic sewing box, using vintage buttons as accents

Revive a Dated Trinket Shelf with Clay Molds

March 22, 2018 by Florence 24 Comments

On one of my thrifting jaunts out of town, I found a dated, junky-looking wall shelf. Darn it! Wish I’d taken a before photo. With a long gash on its side, no paint, and a dated 80’s strawberries inset on the top, it was barely worth a second look. But I wasn’t finding anything else that day, so I decided to chance it.

Restoration of a Super Junky Wall Shelf

The Thrift Store Upcycle Challenge

I got this old, but new project done just in time for the Thrift Store Upcycle Challenge where a group of us bloggers re-creates a thrift store find.

The Rules:

  • Upcycle an item(s) from a thrift store, resale store, or garage sale into a new piece of decor.
  • There’s no monthly theme.
  • There’s no budget to stick to.

Meet the Hosts

Amanda | Domestically Creative
Angela | Simply Beautiful by Angela – Michelle | Michelle James Designs
Molly | Just a Little Creativity – Victoria | Dazzle While Frazzled
Marie | The Inspiration Vault – Marie | DIY Adulation
Lynne | My Family Thyme – Gail | Purple Hues and Me
Jennifer | Cookies Coffee and Crafts – Ann | Duct Tape and Denim
Michelle | Our Crafty Mom – Debra | Shoppe No. 5
Denise | My Thrifty House – Florence | Vintage Southern Picks
Deborah | Salvage Sister & Mister – Yami | The Latina Next Door
Pili | My Sweet Things – Kathleen | Our Hopeful Home
Karen | Dragonfly & Lily Pads

Make sure you follow our board on Pinterest for more upcycled decor inspiration!

And now, back to the project…

The first thing I did was lose those awful strawberries! Then I painted it with Annie Sloan’s “Cream,” which is a soft yellow. But what to do with the inset? I was stumped.

wall shelf with inset and painted in Annie Sloan Cream

I couldn’t decide. It wasn’t very big, but it was about 1/4″ deep.

I finally decided to go with tile. I had done another small tile job that turned out pretty well.

I had a lot of pink, green, and turquoise tile bits, but not much that went with yellow. I told myself it wouldn’t matter once the grout was in, and glued my tile bits down with Mastic.

wall shelf with tile bits in the inset

I set it aside till I had time to go on a tile hunt to do a larger job I was planning. And there it sat for the next 3 years becoming increasingly buried under junk! Every time it caught my eye, I was a bit discouraged by it.

Reckoning day came. I’m having a big purge and yard sale this Spring, so it was time to decide what to do about this wall shelf! Finally!

I still didn’t like the tile/color combo. I dug out a heavy duty screwdriver, pried up all the tile bits, then painted over the yellow with Deco Art Chalky Finish “Lace.”

My goal in re-doing the shelf in the first place was to sell it in my Etsy shop, so it had to look good.

I filled the space with Spackle, which is what I should have done in the first place.

Wall shelf with space filled in with spackle

After repainting, I decided to decorate the filled space with a decorative mold. I thought about an image transfer, but I really wanted to experiment with the molds I already had.

Using the Molds

Here is the beautiful sheet of “Iron Orchid Designs” molds I purchased on Amazon. I should have made a before shot. Here they are covered with powder. You can use Corn Starch or baby powder for coating, which makes it easier to extract your molds.

sheet of molds

I guess you’re wondering about the arrows. I’m pointing out the really thin parts of the mold that would be impossible to cut out without breaking. I didn’t think about that before I bought these! All I saw was how pretty they were.

I attempted to use the one in the middle several times, but courage failed me because I just couldn’t see myself trying to cut it out! After I was all done with the larger flower design to the left, then I examined the picture on the front showing that the molds weren’t cut out that close to the design anyway. Next time I’ll know better.

Types of Clay

There are basically 2 types of clay…the air dry types, and those you bake in the oven. I have both.

I started out with the bake kind….

Super Sculpey bake in oven clay

This was the first attempt, and though burned, I was excited that they didn’t break which I learned was a common problem. I wasn’t planning on eating them…I was going to paint them anyway.

However, they didn’t lie completely flat, and one of the videos I watched said, “don’t be surprised if E-6000 won’t work to glue them down”…a disappointment. E-6000 is my serious go-to glue.

burned clay

Advantages of Bake Clay

It dries faster through baking

It’s paintable

Disadvantages of Bake Clay

Kneading is necessary

Risk of breaking through baking. You either have to re-do or repair

Shrinkage

Problem with lying flat

May not glue with E-6000

For the above reasons, I decided to go with the air dry kind. Unfortunately it only came in one amount…huge! This humongous brick cost $10.99. I’m going to have to do a lot of mold jobs to use that up!

DAS air dry clay

Advantages of Air Dry Clay

It doesn’t shrink

It lies flat.

It’s paintable.

Not necessary to bake and so won’t burn

You can definitely glue it with E-6000 after it dries a little.

Disadvantages of Air Dry Clay

It’s messier…we’re talking starting out with wet or lotioned hands, and ending up with orange hands

It takes longer to dry (36-48 hrs)

Here’s the Air Dry clay flower medallion glued down…now we’re talking! I liked this much better! The air dry clay seems to give the mold more definition, and there’s no problem with lying flat.

Air dry clay flower medallion applied to wall shelf

The next step will be touching up the shelf, painting and waxing the medallion after it dries a bit more.

the wall shelf in its entirety

Here is the medallion painted….next I’ll add some highlights.

Clay mold medallion on wall shelf painted

I achieved this look with a mix of brown paint and black glaze I had on hand. When that dried, I applied a layer of white Gesso, then a layer of dark wax.

paint and glaze highlights on clay medallion

So here’s the thrift store junky wall shelf restored!

Trust me, it’s a whole lot better than the strawberries!

Thrift Store Wall Shelf Final Reveal

Keep reading to see the awesome projects below!

Sharing with these link parties….


And now for more thrifty goodness!

Check out what my fellow upcyclers created below!

 Loading InLinkz ...

An InLinkz Link-up


Filed Under: DIYs to Sell Tagged With: a small tile job on a wall shelf, annie sloan paint, iron orchid mold, repainting a trinket shelf, repainting a wall shelf, restyling a trinket shelf, thrift store upcycle, thrift store upcycle challenge, updating a wall shelf, using clay molds, using clay to decorate a wooden wall shelf, using decorative molds

Plain Jane Purses Given Fancy Makeovers

August 21, 2017 by Florence 42 Comments

“Plain Jane purses given fancy makeovers” is my DIY project for the Monthly Craft Destash Challenge! Every month, a group of bloggers challenges each other to create a new craft or project from their own stash of goodies. You can use anything in your stash, but the rule is to not spend over $10 for the supplies you might need to make the project.


Monthly Craft Destash Challenge


craft-room-destash-challenge


I have so much stash~

Frankly sometimes I don’t know where to turn next. Ha! Last month I destashed beads into DIY Funky Junk Mobile Art. I still have a lot of those, so you’ll probably see another bead project down the road.

If you’d like to join in the Craft Room De-Stash Challenge, you can request to join our Facebook group here!

[clickToTweet tweet=”What crafty creations could you make today from YOUR craft stash?! #CraftRoomDestashChallenge” quote=”What crafty creations could you make today from YOUR craft stash?! #CraftRoomDestashChallenge”]

This month I’ve been in a quandary, and procrastinated, but I thought of what I wanted to do. I have a whole lot of fabric, trims, doilies and vintage buttons in the stash. I sell a lot of it in my Etsy shop, but I use some in projects too.

Confession: I have a purse fetish too~

I love them…vintage purses, almost vintage purses, vintage style purses, acrylic purses, box purses…you name it. And kicking myself because I purged one I was saving for a repurpose project.

The below purse came from Wal-Mart…a simple straw bag. Nothing wrong with it…just wanted to fancify it. Hubby said he loves to see me with a straw bag because it reminds him of when we were dating. (Aww, that was over 20 years ago!)


straw-bag-from-wal-mart


So I gathered blue sewing trims, a crochet doily with a blue border, 2 cream doilies, fabric yo-yos I made from men’s ties, and beads to create this….


straw-bag-embellished-with-sewing-trims


With hot glue, they are there to stay!

The next purse is a vintage one that I’ve been trying to sell. I love it! It’s totally beaded all over, and even has a little coin purse inside, so it most likely dates from the 50’s-60’s era. Made in Hong Kong.

It hasn’t sold though. Do you see the problem on the front?


vintage-white-beaded-purse


Yes that stain looks obvious to me, but my man says he didn’t see it, so I listed it anyway and hoped for the best. It hasn’t sold so time to fix it.

My fix-it method is easy….just glue something over it!

(The method also works on favorite outfits.) The very first night I wore a new denim dress, a huge grease stain just jumped smack dab front and center! Wouldn’t you know it? Next day I hustled over to the local fabric store, bought some red stick-on thingys, came home and ironed them randomly all over the dress. Grease spot gone, or at least minimized.

All that to say…glue things over flaws!

OK back to the purses…

I chose another doily and vintage buttons to do this job.


vintage-beaded-purse-embellished


I’m pretty pleased with how these two turned out!


two-vintage-purses-embellished-with-doilies-fabric-and-buttons


Would you pin? Thank you!


Don’t forget to see what the other crafty bloggers have been up to!

Sharing with these link parties~

An InLinkz Link-up


Filed Under: DIYs to Sell Tagged With: diy purse project, embellishing purses, fixing flaw on vintage purse, monthly crafty destash challenge

My First Jewelry Box Makeover and Indulging my Secret Passion

June 4, 2017 by Florence 34 Comments

Welcome to my first jewelry box makeover! (You have to read all the way to the end to find out about indulging my secret passion!) I know jewelry box makeovers are not new, but hang with me, would ya? As I’ve watched, drooled, and admired other makeovers, I knew the day would come when I finally found one of my own to re-do! And I found it early last year…. see Hauls from Four Thrift Stores.

But as many of you know, 2016 was a rough year for me as I recovered slowly from 3 sets of broken bones. I essentially spent 8 months in a chair, so I’m finally getting a few DIY projects done that I could only dream about last year. You can read some of that saga in Vintage Picker Off Limits Home Tour.

So this little $1.99 jewelry box had its turn. Luckily it didn’t need much, and I got in gear to carry out my vision.


Jewelry box awaiting a makeover

 The Makeover Process~

My go-to color is always white because it usually sells better, and this is destined for my Etsy shop.

Taking the plunge on buying Dixie Belle “Dropcloth,”


dixie-belle-paint

I’m crazy about this paint, its coverage, and the look. I had totally used up all my other white with the Jewelry chest makeover! (wink, wink) See why in this post DIY Headache.  I know you remember it!

The first thing I did was remove the glass in the door. Before I bought this baby, I made sure it had removable door glass. We had hardware cloth on hand, so all I had to do was cut the wire to the appropriate dimension as the glass in the door.

Yeah, right. Easier said than done.

You ever used vintage IRON tin snips? I could barely hold them in my lily white hand, much less guide it into cutting. I had to rest them on the table to cut, but with difficulty, I achieved it.

humongous-vintage-tin-snips

So now all I had to do was paint it and try not to hit the jewelry felt inside. The little knobs on the drawers were not removable, so I just painted those too.

TA-DA!

The Finished Result~

first jewelry box makeover


I used part of a French stencil found on Amazon for the top. I mixed a bit of white and black acrylic paint found at a garage sale to form the stenciled design.

And added a bit of drawer interest….


drawer-details-on-jewelry-box-makeover


I decoupaged the napkins onto the drawer sides. I have a lifetime supply of these napkins, so you’ll definitely be seeing them again! The subtle colors blend well with the paint color, I think. The felt inside is a pale lavender-gray, and in good shape.

What was the hardest part of this job?

  • Getting the stencil centered and straight! That’s the only thing I hate about stenciling.
  • Getting the drawers to fit into the slots after having been painted and decoupaged. That took a good bit of sanding and waxing, but they finally fit.
  • Cutting that dang hardware cloth with the mammoth tin snips!

Notice I’m actually holding and cutting with those snips here. I must have grown stronger since the day I cut that “cloth.” LOL

Later on I learned there is an easier way. I just didn’t find it in my husband’s vast array of tools.

BIG-vintage-tin-snips

I love how my first jewelry box makeover turned out! What about you?


first-jewelry-box-makeover


This one is also waiting in the wings until I can get around to it. Stay tuned!


large-jewelry-box-awaiting-a-makeover


Indulging My Secret Passion~

By the way, I’ve been thinking over adding another topic to my vintage niche here on the blog. I would like to add a gardening element because it’s truly one of my passions! I’m constantly amazed at what I learned from my Mother, an avid gardener, even when I didn’t think I was listening….LOL. I’ve been thinking about this for some time even though it doesn’t exactly fit my niche. Would there be interest if I were to indulge my secret passion?


day-lily-a-favorite-flower
A Favorite Flower

Filed Under: DIY Projects, DIYs to Sell Tagged With: jewelry box makeover, painting a vintage jewelry box, refurbishing a jewelry box

  • 1
  • 2
  • 3
  • Next Page »

I’ve Been Featured…

ive-been-featured-link-party-buttons
oh-my-heartsie-girl-wonderful-wednesday-button
snickerdoodle-button

Beezer…Over the Rainbow Bridge 2017

Vintage Southern Picks on Etsy

Vintage Southern Picks on Etsy

Everything Square Dance & Western on Etsy

Everything Square Dance & Western on Etsy

© 2017 Vintage Southern Picks | All Rights Reserved

Disclosure: Some of the links on this website may be affiliate links. When you make a purchase from these links, I earn a small commission.