• Home
  • About
    • About Me
    • Contact Me
  • Etsy Shop
  • Link Parties/Featured
    • I’ve Been Featured
    • Sweet Inspiration Link Party
  • Personal Diary

Vintage Southern Picks

Cheapskate Picker Sharing Finds, DIY & Selling Tips

Facebook   Twitter   Pinterest   Google+   RSS
  • DIY Projects
    • DIYs to Sell
    • Holiday/Seasonal
    • Home and Garden DIY
  • Home and Garden
    • Home Organization
    • How I Organize My Ebay/Etsy Home Office
    • Home Tours
    • Party Games
  • Selling Tips
    • Buys I Avoid
    • Shipping
    • What’s Selling on Etsy/Ebay
    • Yard Sales
      • How to Give a Yard Sale
      • What Not to Say in Yard Sale Ads
      • Yard Sale Humor
  • Vintage Finds
    • Thrift Store Finds
    • Mystery Items
    • Yard/Estate Sale Finds
    • Vintage Junk Giveaways
  • Disclosure Policy
  • Privacy Policy

Make Your Own Awesome Napkin Designs for Napkin Decoupage

May 6, 2018 by Florence 44 Comments

Life Got in the Way, and Here’s My Excuse…

I wanted to say a big welcome to all my new subscribers!! I normally post once a week, but I couldn’t get it together last week. Too much going on with us deciding to seriously downsize our house, and do all those home repairs you sort of live with for years, but don’t see anymore…you know the ones I mean! Then thinking about what we need to get rid of in an estate sale for moving in the near future.

Add to that minor surgery, looking for a new set of wheels, getting a speeding ticket (oops), scheduling a 4-hour driving school, and then being called for jury duty too (and I haven’t even been yet)…well, you can see why I didn’t have time to finish my post last week. Excuses, excuses…

I spend too much time sitting around thinking about what I need to do, but not actually doing it. Tell me I’m not the only one! That’s life. On to the post!

The Project

I’ve been working here and there on this project over the last several weeks. I found an old drum table at an estate sale a couple of years ago, and finally decided how I wanted to finish it. You’ll see that in another post.

In this post, I’m discussing how I finished the top with decoupage. I discovered how to Make Your Own Awesome Napkin Designs for Napkin Decoupage! As this is my 4th project, it’s a good bet to say I love it! Glass candle holders, old toolbox/jewelry chest that was a super DIY headache, and Jewelry Box Makeover have all been my guinea pigs as I learn the craft.

I’ve found pretty napkins at yard sales, estate sales, Etsy, and Amazon, and I like all of them. But when I want a change, or a new design, I can’t find what I’m looking for.

This is where my idea was born…why not create my own design by printing on a napkin?

I’ll tell you how I did it.

The table is going in front of these curtains, so the design had to complement the curtains. (And let’s hope it goes with the curtains in whatever garden home is in our future.)

curtains for color matching

Where to Find Images to Decoupage

Next I scoured The Graphics Fairy and Pinterest for vintage images I liked that had those colors.

I settled on these. Shabby Chic style is my game. I LOVE it! It’s not the farmhouse look that’s insanely popular, but lest you think Shabby Chic is dead, just take a tour on Pinterest. You’ll see it’s not.

vintage images to choose from for napkin decoupage project

How to Get the Design onto the Table was the Next Decision

Image transfers were out. For this project, I really wanted to do a collage, and didn’t want the table to come in contact with the amount of water necessary to complete an image transfer project.

I didn’t want to use traditional decoupage using layers of printer paper, so I leaned towards napkins, which are super thin.

An Idea was Born

Wonder if it would work to print my chosen image on the layers of napkin I peel off, I mused. If you’ve never done napkin decoupage, most decorative napkins are standard 3-ply, so in DIY projects, you’re using the top pretty layer. I’m using the 2 back layers I peeled off, saving them from the trash can.

2 ply paper napkin backing is what I used in this project

Experiment with Other Types of Paper Besides Napkins

First I experimented using white packing paper that came in an Amazon shipment. It gave my image a nice crinkly effect, but that paper was thicker than regular printer paper…not what I wanted.

On to the napkin idea! I peeled off the back 2 layers, placing one thickness on top of a piece of printer paper. To keep it aligned, I taped the borders down with scotch tape, then cut off the excess.

how to proceed with printing on napkin ply

What to Consider Before Running a Napkin Through Your Printer

I doubt it would work to run a thin layer of napkin through a printer by itself. A 1-ply napkin layer is much too fragile and I didn’t want to chance it. I secured the napkin to a piece of printer paper first, but I wasn’t sure it would work.

I thought about using adhesive spray to adhere the napkin to the paper, but I was afraid I would have trouble getting the napkin to come off in one piece.

Do the pieces of tape interfere with the design? For me it didn’t. I either tore around them or let them stay. It will totally depend on your design and what you want to accomplish. It will hardly be noticed after applying the final sealing Mod Podge layer to the top.

Fingers crossed, I ran the job. Success! The design came out almost perfectly! It was a little wrinkly, but I ironed it (no steam setting). Ironing isn’t necessary, but I prefer it because it helps to smooth out the paper.

image on napkin vs packing paper
Comparing the image printed on the napkin vs printed on packing paper


My first piece had a distortion at the top, but I’m leaving it. If it bothers me later on, I can always cover it with another piece of napkin. That’s one of the great things about decoupage. Make a mistake…just cover it up, and napkin layers are so thin, it’s not a problem!

Showing the distortion on my first image

Here’s the next image printed on the other napkin ply…Perfect!

attempt 2 is perfect

The Procedure

I used these napkins because they complement the curtains and I have a lot of them.

napkins for decoupage

When choosing pieces of the design to use, here’s an easy way to cut it out so all the edges look nicely feathered allowing them to blend into the design.

Go around the piece with a wet brush or Q-Tip.

wet edges of napkin

Gently tear along the wet line, which makes them look uneven…the look I was going for.

how to tear the napkin to get the feathered look

The drum table is hexagonal (6-sided), so I spaced out pieces of the napkins evenly around it.

placing the napkin pieces onto the table

I cut out pieces of the hydrangea blossoms to go in between.

The piece in the center is one sheet of French script, torn in half to be seen around what’s placed on top.

Hydrangea blooms spaced out on the table and one sheet of French script for the background

More Decoupage Gluing Tips

To avoid tearing the napkin when gluing, never slide your finger across it. Instead “pounce” your finger on top. That helps flatten napkin nubbies too. Nubbies are the little bumps on the edges of napkins.

pounce on top of image

When working with larger pieces, like the French script, place a sheet of Saran wrap on top and gently scrape across it with a credit card. This helps remove air bubbles while smoothing it out.

smoothing out a larger piece using saran wrap and a credit card

I accidentally discovered an extra sheet of script on top helped eliminate a developing problem.

another sheet of script on top

Because of the sheerness of the 1-ply napkin, I feared the final picture for the top would look funny placed on top of that whitish center, but this sheet of yellowish script helps fill in while adding to the look of the final image!

Here’s the final voila! I’m absolutely thrilled with how it turned out!

Finished napkin decoupage on top of drum table

It’s not perfect, but I love it. After all the hoopla of getting it to match the curtains, I rearranged furniture and moved it, ha ha. What do you think? Would you attempt to make your own designs?

FYI…I used the backing layers of 4 dinner size napkins for this project.

Sharing with these link parties….

If you’re panting for more Napkin Decoupage Projects…

featured image for decoupage napkin glass candle holders


Filed Under: Home and Garden DIY Tagged With: getting the feathered look in napkin decoupage, how to do napkin decoupage, making your own designs for napkin decoupage, napkin decoupage procedure, napkin decoupage tips, new technique for napkin decoupage, using vintage images for napkin decoupage

When Chalk Paint Won’t Work, Try Gesso!

April 26, 2018 by Florence 28 Comments

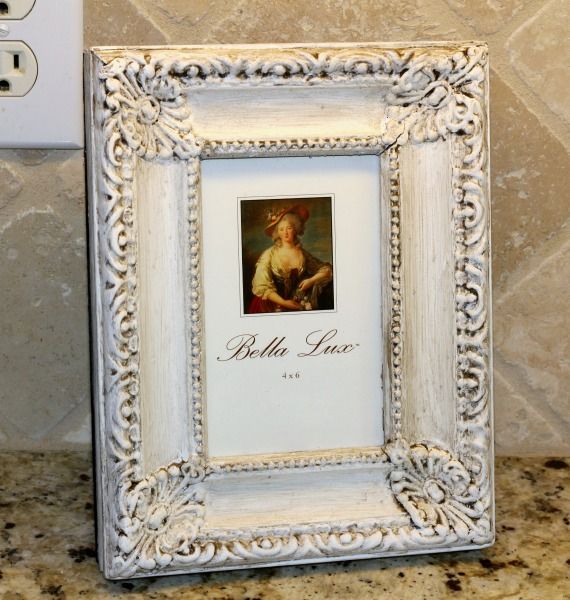
I found a cute vintage style frame for 99¢ at a thrift store, and really liked those raised details! I wanted to bring them out with farmhouse highlights. I’m actually working with 2 frames in this post, so keep reading to the end.

ornate-picture-frame

The plan was to paint it first with black, then follow with white and distress so the black would show through…my project for the Monthly Thrift Store Upcycle Challenge.

I’m always looking for an easier way to get the look I love, rather than always chalk paint and dark wax, which I don’t like working with.

Learn more about the Thrift Store Upcycle Challenge below

The Thrift Store Upcycle Challenge

We bloggers challenge each other to create something from a thrift store find. It can be anything! We can spend any amount to create our own respective masterpieces. Other than the cost of the 2 frames ($2.98), I had everything else on hand.

The Rules:

    • Upcycle an item(s) from a thrift store, resale store, or garage sale into a new piece of decor.


    • There’s no monthly theme.


  • There’s no budget to stick to.

Meet the Hosts

Angela | Simply Beautiful by Angela
Jennifer | Cookies Coffee and Crafts – Michelle | Our Crafty Mom 
Deborah | Salvage Sister & Mister – Pam | P.S. I Love You Crafts
Gail | Purple Hues and Me – Ann | Duct Tape and Denim
Pili | My Sweet Things – Denise | My Thrifty House
Victoria | Dazzle While Frazzled – Chelc | Inside the Fox Den
Michelle | Michelle James Design – Marie | The Inspiration Vault
Yami | The Latina Next Door – Florence | Vintage Southern Picks
Debra | Shoppe No. 5 – Kathleen | Our Hopeful Home
Deborah | Salvage Sister & Mister
Make sure you follow our board on Pinterest for more upcycled decor inspiration!

Back to the Frame Project~

My usual method is to sand a bit first to minimize any glossiness, but I discovered the frame wasn’t wood, but possibly resin. After applying 2 coats of black spray paint, it didn’t seem to be sticking very well. I was positive I let it dry long enough.

Yes, that sucker dried for 2 whole days, but when I barely touched it, the paint peeled right off. UGH! I felt like tossing it in the trash, but I don’t give up so easily.

Well really, I think it’s because I spent money on it, so it’s not going in the trash!

Frame messed up and paint not sticking

I sanded a bit to see if any more paint would come off. I didn’t want more layers lifting off with whatever I might put on top of it. I’m not sure why it wouldn’t stick. After all, chalk paint sticks to everything right?

Since I had just been reading about Gesso, I decided to give it a try. I already had it on hand from another project I’d done some time ago, but it landed in the back of all my paints and I forgot about it. I was ready to experiment with it again.

Bottle of Gesso

What is Gesso?

If you haven’t tried Gesso before, it comes in white, black, and gray, in various size bottles, and is found in the artist’s paint section of craft stores. Artists use it to prime their canvases, but it can also be used as paint or as a paint supplement. You can water it down and use as a wash, or use it full strength from the bottle. You can mix it with paint, as I decided to do here.

Ways to Mix It~

No rocket science, I just poured a little Gesso into a plastic pudding cup I was using…maybe a tablespoon, then added another tablespoon of white chalk paint. I’m estimating…I truly didn’t measure anything. Then I applied it to the frame with a narrow bristle brush.

I was hoping it would stick, but I was prepared for the worst.

Success! I don’t have a photo of it dressed in white, but it worked.

What I totally love is how the beautiful  highlighting effects on the details were achieved!

Picture frame with mixed Gesso and white paint

Are these not beautiful?

Details of picture with frame with highlights

details of picture frame with highlights

An Easy Way to Highlight

I found a product giving these wonderful effects…Dixie Bell Grunge Glaze. I’m not being paid to say it either…I just like the product. I like it much better than using Annie Sloan’s Dark Wax because my fingers don’t come in contact with the material at all, and I don’t get that sticky, messy feel. A little goes a long way too.

Dixie Belle Grunge Glaze

If you decide to try it, don’t be taken aback by the color when you open the jar. It looks light gray like this. But it dries a delicious dark brown…just the way I like it!

how grunge glaze looks in the jar

The Second Frame is Really a Tray

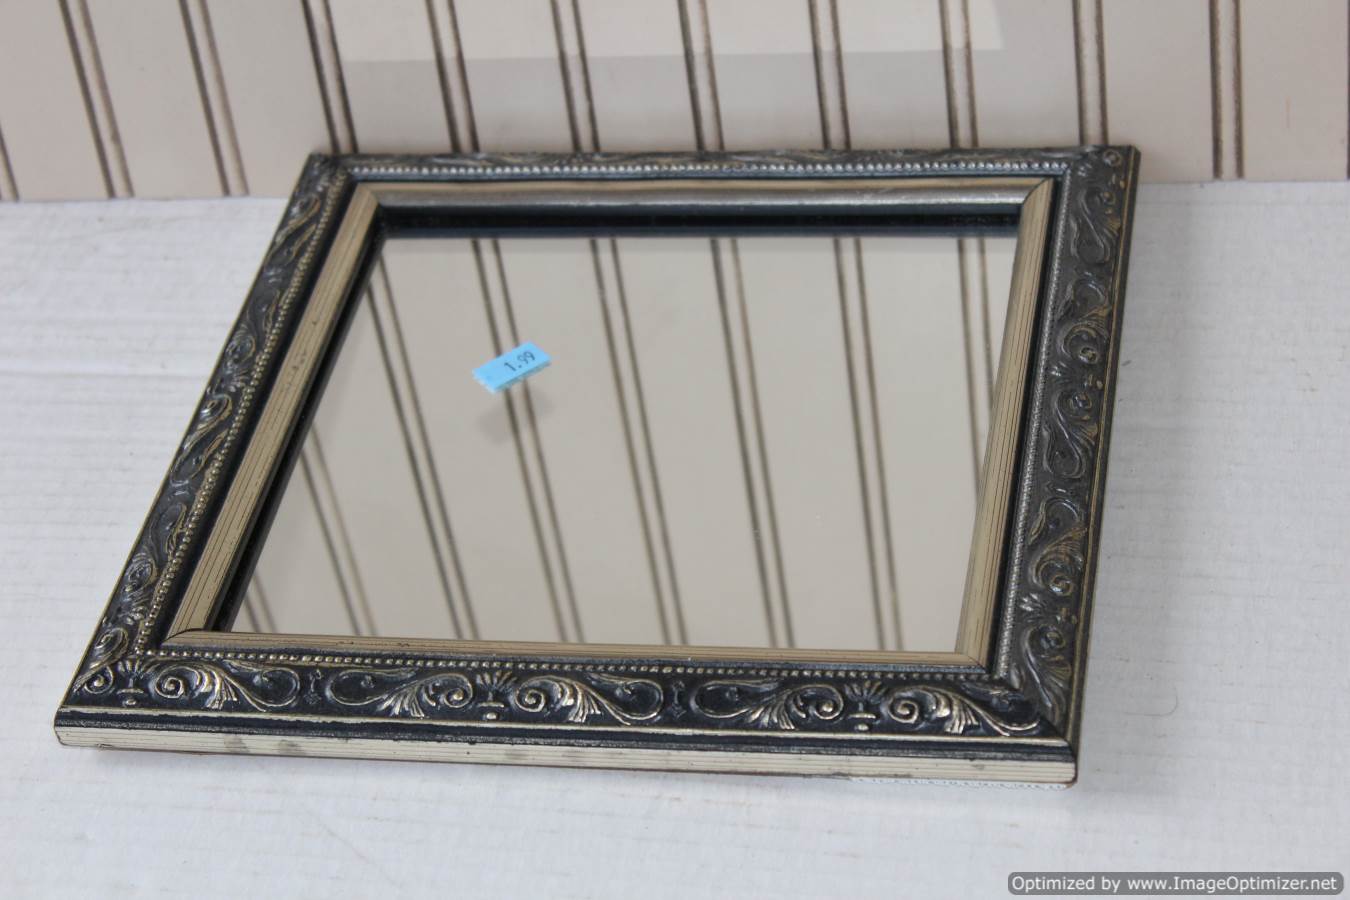
Here’s the second $1.99 thrift store frame I experimented with, and it looks pretty good on its own, I admit, but I wanted a different look. No hanger on the back, so it could be a tray.

I alternated my Gesso/paint mix with Grunge Glaze in several layers, and used a light layer of Annie Sloan Duck Egg in between. I’m trying to decide if I want to highlight with Rub n Buff gold. I’m hesitating because if I don’t like it, I’ll have to start over.

I could fake it and say I’m crazy about the second look. I’m not. I think it’s missing something. I’ll continue to experiment as time goes on, but I love look #1!

I hope I’ve encouraged you to experiment with Gesso and Dixie Belle’s Grunge Glaze. It’s a nice alternative to dark wax.


And now for more thrifty goodness!

Check out what my fellow upcyclers created below!

An InLinkz Link-up


Filed Under: DIYs to Sell Tagged With: beautiful effects on a picture frame, chalk paint and gesso, good alternative for dark wax, highlighting a picture frame tray, highlighting a picture frame with glaze, refurbishing a picture frame, refurbishing thrift store frames with paint gesso and grunge glaze, repainting a picture frame

Shabby Chic Sewing Basket Makeover (What to Do When Vintage is Less Than Perfect)

April 14, 2018 by Florence 48 Comments

This fabric covered, shabby chic sewing basket stole my heart when I saw it at an estate sale last year! As I recall, just about everything at that sale was out-of-reach-expensive, except the sewing basket. As it was only $2, I snapped it up, knowing it was in less than perfect condition…waayyy less than perfect if you know what I mean. But it was still cute as a button…you could even s-a-a-y-y….

I Found a Treasure!

shabby chic sewing basket

Before I go any further…

It’s time for the Monthly Craft Destash Challenge!

In my project, I’m merely scratching the surface of my huge doily stash. Keep reading to see what I did and why.

craft-room-destash-challenge

Every month a group of bloggers are challenged by C’mon Get Crafty to create a new craft or project from their own stash of goodies! Check out some awesome creations you might be able to make from your own stash! #CraftRoomDestashChallenge

[clickToTweet tweet=”What crafty creations could you make today from YOUR craft stash?! #CraftRoomDestashChallenge” quote=”What crafty creations could you make today from YOUR craft stash?! #CraftRoomDestashChallenge”]

If you’d like to join in the Craft Room De-Stash Challenge, you can request to join our Facebook group here!

 Loading InLinkz ...

So This was a Treasure???

I decided to put it in my Vintage Southern Picks Etsy shop even though it had several issues, such as:

  • one of the string handles was worn in two;
  • the box was very faded,
  • it was all over soiled,
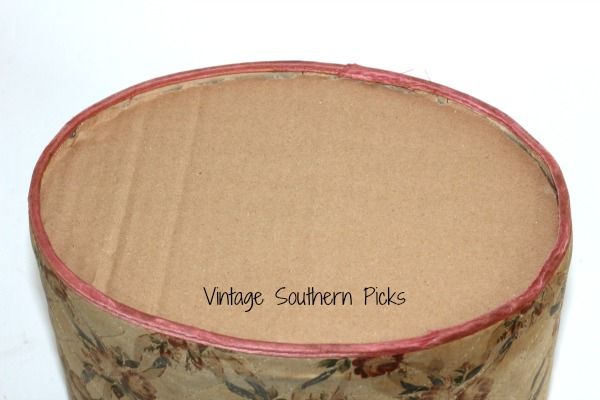
  • and it had an unsightly curling bottom rim problem, caused by exposure to moisture. (The box is cardboard.)

It had to go!

the curling bottom rim of the box had to go
The curling bottom rim of the box

It Didn’t Sell But…

My box obviously didn’t sell, but it received many favorites, which encouraged me to attempt a makeover. I was a little leery of doing it because of the huge fail I had when trying to re-do another one I had a few years ago.

My main goal was to preserve what was here, not tear anything off. That was the big and bad last time. Tearing everything off literally tore the box apart, and like Humpty Dumpty, I couldn’t figure out how to put it all back together, LOL.

Process of Restoration

I tackled the bottom. First I wet the rim just a bit until it was damp, but not dripping wet.

I cut 2 pieces of thick cardboard to fit tightly inside the rim in order to push it outward, hopefully allowing it to dry straight. Fingers crossed.


2 oval cuts of cardboard

Now look at that! I was thrilled my idea worked!

the rim of the box was straight

Next the woven rope handles needed to be replaced. I could have bought them new, but they would look new, and I needed them to look old. I still had the parts to the failed sewing box project. Maybe those ties would work!

And they did. They looked like they were made for it. I had my hubby do this part because sometimes I’m usually all thumbs.

OK, admit it, I was afraid to screw it up.

replacing the rope handles
Notice how the top of the box shows how clean the fabric covering used to be!


The lid also needed regluing…an easy fix, but wow, this box had more problems than I realized.

the lid needed to be reglued

And the biggest problem was what to do next to preserve the charm, yet hide the fade and soiling as much as possible.

How I Used the Craft Stash

This is where the craft stash comes in. I decided to cover it strategically with doilies, which hopefully would take attention away from the fade and soiling, yet not cover the charming fabric completely.

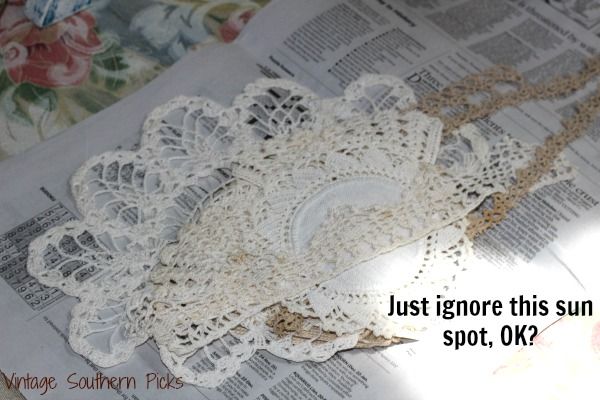
I raided my huge stash of doilies to come up with a small pile.

pile of doilies stash

And this is the part that really makes me nervous…deciding on a design…where to start?

deciding on the design is the hardest part

I placed doilies this way and that.

In exasperation, I told myself …”JUST DO IT!”

You don’t need any fancy glue by the way. Ordinary Elmer’s Glue works just fine.

no fancy glue needed

Starting with the lid, I centered the doily on it. It’s actually half a butterfly, but did you know this crochet pattern is known as a “pineapple” because all the parts of it are in the shape of one?

starting with the lid

Evenly apply dots of glue.

all you need are dots of glue evenly applied

I used vintage coasters and bits of crochet trim.

I used coasters on the box

See those 3 green floral things to the right up above? If you’re new here, you can read how I turned those boring clear glass candle holders into vases.

I was delighted to find the square crochet coasters at a yard sale years ago.

side view of sewing basket

And here’s the finished box! And since I have a ton of vintage buttons, I used a few on both sides as little accents.

front view of restored sewing basket

All in all, I’m pretty pleased with how it turned out! Such an improvement over the original, don’t you think?

But if I had it to do over….thinking I might dye those doilies so they don’t look so white.

See that measuring tape? Even that’s vintage! I remember my mama using it all the time, but we won’t say…ahem…how old…

And if you’re curious about that picture in the right background, there’s a story to that too! I made the frame out of some curious found junk.

Do you like shabby chic? Have you restored any sewing boxes? I’d love to hear about it in the comments!

Be sure to drop by the other projects in the link up…you’ll come away inspired!

Sharing with these Link Parties….

PLEASE PIN Y’ALL!

Other shabby chic posts you may enjoy….

found-forgotten-junk-makes-a-sweet-vintage-vignette-featured-image


Filed Under: DIYs to Sell Tagged With: crochet trims help beautify a vintage sewing box, monthly craft destash challenge, sewing box makeover, shabby chic makeover of a vintage sewing box, using doilies to restore a shabby chic sewing box, using vintage buttons as accents

Revive a Dated Trinket Shelf with Clay Molds

March 22, 2018 by Florence 24 Comments

On one of my thrifting jaunts out of town, I found a dated, junky-looking wall shelf. Darn it! Wish I’d taken a before photo. With a long gash on its side, no paint, and a dated 80’s strawberries inset on the top, it was barely worth a second look. But I wasn’t finding anything else that day, so I decided to chance it.

Restoration of a Super Junky Wall Shelf

The Thrift Store Upcycle Challenge

I got this old, but new project done just in time for the Thrift Store Upcycle Challenge where a group of us bloggers re-creates a thrift store find.

The Rules:

  • Upcycle an item(s) from a thrift store, resale store, or garage sale into a new piece of decor.
  • There’s no monthly theme.
  • There’s no budget to stick to.

Meet the Hosts

Amanda | Domestically Creative
Angela | Simply Beautiful by Angela – Michelle | Michelle James Designs
Molly | Just a Little Creativity – Victoria | Dazzle While Frazzled
Marie | The Inspiration Vault – Marie | DIY Adulation
Lynne | My Family Thyme – Gail | Purple Hues and Me
Jennifer | Cookies Coffee and Crafts – Ann | Duct Tape and Denim
Michelle | Our Crafty Mom – Debra | Shoppe No. 5
Denise | My Thrifty House – Florence | Vintage Southern Picks
Deborah | Salvage Sister & Mister – Yami | The Latina Next Door
Pili | My Sweet Things – Kathleen | Our Hopeful Home
Karen | Dragonfly & Lily Pads

Make sure you follow our board on Pinterest for more upcycled decor inspiration!

And now, back to the project…

The first thing I did was lose those awful strawberries! Then I painted it with Annie Sloan’s “Cream,” which is a soft yellow. But what to do with the inset? I was stumped.

wall shelf with inset and painted in Annie Sloan Cream

I couldn’t decide. It wasn’t very big, but it was about 1/4″ deep.

I finally decided to go with tile. I had done another small tile job that turned out pretty well.

I had a lot of pink, green, and turquoise tile bits, but not much that went with yellow. I told myself it wouldn’t matter once the grout was in, and glued my tile bits down with Mastic.

wall shelf with tile bits in the inset

I set it aside till I had time to go on a tile hunt to do a larger job I was planning. And there it sat for the next 3 years becoming increasingly buried under junk! Every time it caught my eye, I was a bit discouraged by it.

Reckoning day came. I’m having a big purge and yard sale this Spring, so it was time to decide what to do about this wall shelf! Finally!

I still didn’t like the tile/color combo. I dug out a heavy duty screwdriver, pried up all the tile bits, then painted over the yellow with Deco Art Chalky Finish “Lace.”

My goal in re-doing the shelf in the first place was to sell it in my Etsy shop, so it had to look good.

I filled the space with Spackle, which is what I should have done in the first place.

Wall shelf with space filled in with spackle

After repainting, I decided to decorate the filled space with a decorative mold. I thought about an image transfer, but I really wanted to experiment with the molds I already had.

Using the Molds

Here is the beautiful sheet of “Iron Orchid Designs” molds I purchased on Amazon. I should have made a before shot. Here they are covered with powder. You can use Corn Starch or baby powder for coating, which makes it easier to extract your molds.

sheet of molds

I guess you’re wondering about the arrows. I’m pointing out the really thin parts of the mold that would be impossible to cut out without breaking. I didn’t think about that before I bought these! All I saw was how pretty they were.

I attempted to use the one in the middle several times, but courage failed me because I just couldn’t see myself trying to cut it out! After I was all done with the larger flower design to the left, then I examined the picture on the front showing that the molds weren’t cut out that close to the design anyway. Next time I’ll know better.

Types of Clay

There are basically 2 types of clay…the air dry types, and those you bake in the oven. I have both.

I started out with the bake kind….

Super Sculpey bake in oven clay

This was the first attempt, and though burned, I was excited that they didn’t break which I learned was a common problem. I wasn’t planning on eating them…I was going to paint them anyway.

However, they didn’t lie completely flat, and one of the videos I watched said, “don’t be surprised if E-6000 won’t work to glue them down”…a disappointment. E-6000 is my serious go-to glue.

burned clay

Advantages of Bake Clay

It dries faster through baking

It’s paintable

Disadvantages of Bake Clay

Kneading is necessary

Risk of breaking through baking. You either have to re-do or repair

Shrinkage

Problem with lying flat

May not glue with E-6000

For the above reasons, I decided to go with the air dry kind. Unfortunately it only came in one amount…huge! This humongous brick cost $10.99. I’m going to have to do a lot of mold jobs to use that up!

DAS air dry clay

Advantages of Air Dry Clay

It doesn’t shrink

It lies flat.

It’s paintable.

Not necessary to bake and so won’t burn

You can definitely glue it with E-6000 after it dries a little.

Disadvantages of Air Dry Clay

It’s messier…we’re talking starting out with wet or lotioned hands, and ending up with orange hands

It takes longer to dry (36-48 hrs)

Here’s the Air Dry clay flower medallion glued down…now we’re talking! I liked this much better! The air dry clay seems to give the mold more definition, and there’s no problem with lying flat.

Air dry clay flower medallion applied to wall shelf

The next step will be touching up the shelf, painting and waxing the medallion after it dries a bit more.

the wall shelf in its entirety

Here is the medallion painted….next I’ll add some highlights.

Clay mold medallion on wall shelf painted

I achieved this look with a mix of brown paint and black glaze I had on hand. When that dried, I applied a layer of white Gesso, then a layer of dark wax.

paint and glaze highlights on clay medallion

So here’s the thrift store junky wall shelf restored!

Trust me, it’s a whole lot better than the strawberries!

Thrift Store Wall Shelf Final Reveal

Keep reading to see the awesome projects below!

Sharing with these link parties….


And now for more thrifty goodness!

Check out what my fellow upcyclers created below!

 Loading InLinkz ...

An InLinkz Link-up


Filed Under: DIYs to Sell Tagged With: a small tile job on a wall shelf, annie sloan paint, iron orchid mold, repainting a trinket shelf, repainting a wall shelf, restyling a trinket shelf, thrift store upcycle, thrift store upcycle challenge, updating a wall shelf, using clay molds, using clay to decorate a wooden wall shelf, using decorative molds

Give a Totally New Look to Tired Glass Candle Holders

March 19, 2018 by Florence 56 Comments

I love using napkin decoupage! You get a totally new look for tired glass candle holders using a simple napkin. I’m not stealing this idea from anyone. It’s just the first time I’ve applied a patterned napkin to curved glass, and I’m excited about the final result! It was quite a challenge getting the look I wanted… allowing the design to shine, rather than slapping the napkin on any old way.  I started with a plain trio of candle holders similar to the goblet below.

Yes, I lost all my photos in a computer crash last year because somebody didn’t do a backup!

How to Give New Life to Plain Glass Candle Holders

plain glass candleholder

Before I go any further, I’m joining in the Monthly Craft Destash Challenge. That’s where we bloggers design a project we create from our craft stashes. Read more about that below.

craft-room-destash-challenge

Every month a group of bloggers are challenged by C’mon Get Crafty to create a new craft or project from their own stash of goodies! Check out some awesome creations you might be able to make from your own stash! #CraftRoomDestashChallenge

[clickToTweet tweet=”What crafty creations could you make today from YOUR craft stash?! #CraftRoomDestashChallenge” quote=”What crafty creations could you make today from YOUR craft stash?! #CraftRoomDestashChallenge”]

If you’d like to join in the Craft Room De-Stash Challenge, you can request to join our Facebook group here!


My challenge was in using some of the paper napkins I have stashed away, but I’m hardly making a dent in my pile. How many napkins does it take to do a project like this? Keep reading below for the answer.

I used a set of napkins like this…

Now I love the subtle colors and the delicate shades of pink, but to tell you the truth, I wasn’t totally crazy about these napkins at first. They grew on me.

napkins for decoupage

Where to Find Pretty Napkins?

If you’re like me, the grocery store was the first place I looked, but they had only blah and boring.

Big birthday napkins with bold colors shouting “I’m ONE!”

A package of 500 white napkins that are strictly to wipe your mouth.

Nothing interesting.

I’ve found them at yard and estate sales, but when you’re looking for them, they won’t be within 300 miles.

Even Amazon and local craft stores didn’t have many choices I liked. I found the green ones on Amazon…the only choice I even remotely liked. This was one time Amazon didn’t have absolutely everything.

The best I’ve found are napkin dealers on Etsy. You can buy single napkins, or 2-3 napkins for a reasonable price, like the ones below.

A big thank you to TamarasPaperNapkins and NicsPrettyPapers for their gorgeous napkins!

rose napkin for decoupage
Purchased from TamarasPaperNapkins on Etsy
pink roses napkins for decoupage
Purchased from NicsPrettyPapers

How Many Napkins to Use

How many napkins did it take to do 3 glass candle holders? Before I bought them, I visualized that 20 napkins might do it, but it took only one dinner size! I was flabbergasted! Of course cheapskate picker is going to make sure she uses every last tidbit of the napkin. Nothing goes to waste!

Completing the Look

As you can see, I’m using one as a vase, and as a final touch, I covered the rim of the candle holders with a bit of jute string. This is not just for decoration folks…it’s effectively hiding my indecision as to how far to go over the rim with the napkin. Luckily string covers a wealth of mistakes!

And there’s a reason why I’m using it as a vase, which you’ll find out if you keep reading.

I’m really pleased with how these turned out! I worried they would look too blotchy and pieced together, but thankfully, it’s not a problem.

A Trio of napkin-decoupaged glass candle holders

Basic Procedure of Using Napkins for Decoupage

Unfortunately no pictures of the process remain due to my computer crash.

  1. Most decorative napkins are 3-ply. Separate the 2 white back layers until you’re down to the last patterned layer. If you don’t have fingernails for this job, you’re out of luck.
  2. Depending on what you’re decoupaging, you may decide to use the whole sheet at once, or in my case, pick parts of the napkin you want to use.
  3. The creases in the napkin won’t be a problem, but if desired, you can iron them on a low setting. (no steam). Yes, you can iron paper!
  4. Tear napkin into pieces you want to use. You can tear them dry or wet. I’ve found it’s much easier to tear if you apply a wet bead with an eye dropper or paint brush along the border of the piece you want to tear off.
  5. Working in sections, apply Mod Podge to the candle holder (or whatever you’re using), not the napkin.
  6. I find it helpful to cover the newly decoupaged parts with clear plastic wrap. You can then use your finger to very gently dab wrinkles without touching the napkin itself, which easily tears.
  7. Continue covering your vessel with the napkin pieces until all is covered.
  8. Apply a final coat of Mod Podge over the whole object to seal it.

What I Learned from the Process

As said, these were harder and more tedious to do because I wanted them to look like the napkin, with the flower clusters scattered. Using a napkin with a uniform pattern would have been so much easier and quicker.

2 Napkin decoupaged glass candle holders used as vases

I saw napkin decoupage used years ago on someone’s blog, and fell in love with the look. She stressed painting the inside of the vessel first, and I’m not sure why. I did it, but wouldn’t do so again.

If you’re using them for candle holders, you can barely see the glow of the candle through the paint layer, and the decoupage. Of course, if you’re using these for vases, it wouldn’t matter.

Creating a Centerpiece with Candle Holders

You can see how I’m using them below in a shabby chic Easter centerpiece. Nobody taught me how to arrange a centerpiece. Anything goes if you like it! I used 10 thrifted and estate sale finds to style an old mirror tray.

Easter centerpiece with Vintage Finds

Just a bit of pink Easter basket grass on top of the tray to conceal the mirror.

A metal cage to the left is filled with white tulle and mini lights.

A bird’s nest with eggs imparts a hint of Spring, capped with a faux pink hydrangea bloom.

Finishing out the look are bits of an arrangement from last year…bunnies, eggs, and a bunny napkin ring.

Finds from this year I liked…hen and chick treat baskets, and a large ceramic Easter bunny

My 3 candle holders. Use whatever you have on hand to create a centerpiece that pleases you.

You can see below, I didn’t spend much money on this:

1-Large ceramic rabbit-$2.50

2-3 candle holders-free

3-Faux hydrangea bloom-$3

4-Small cage-$2

5-white tulle-free

6-Easter grass-50¢

Easter centerpiece identifying vintage finds by price

7-Vintage mirror tray-$2

8-Bird’s nest with eggs-free

9-Small hen and chick treat baskets-25¢ each

10-Bunny napkin ring-25¢

Easter centerpiece using a doll bench in the background
Here I added to the background a doll bench I recently painted.

Final Cost-$10.50

I’m really enjoying the centerpiece and my napkin candle holders! They’re very versatile and can be used in any setting.

I had so much fun with this, I know I’m going to become a napkin decoupage fiend queen, so look out!

Have you done any napkin decoupage projects? Have tips to share?

Sharing with these link parties…

And now be sure to visit my blogging buddies below to see their destash projects for the month!

 Loading InLinkz ...

Filed Under: DIY Projects Tagged With: beautify plain candle holders, decoupage candle holders, decoupaged napkin candle holders, decoupaging with napkins, easter arrangement, easter centerpiece, how to decoupage napkins on glass, how to decoupage with napkins, monthly craft destash challenge, napkin decoupage project, new look for candle holders, spring arrangement, styling a centerpiece, using mod podge, using vintage finds, using what you have on hand

  • 1
  • 2
  • 3
  • …
  • 9
  • Next Page »

I’ve Been Featured…

ive-been-featured-link-party-buttons
oh-my-heartsie-girl-wonderful-wednesday-button
snickerdoodle-button

Beezer…Over the Rainbow Bridge 2017

Vintage Southern Picks on Etsy

Vintage Southern Picks on Etsy

Everything Square Dance & Western on Etsy

Everything Square Dance & Western on Etsy

© 2017 Vintage Southern Picks | All Rights Reserved

Disclosure: Some of the links on this website may be affiliate links. When you make a purchase from these links, I earn a small commission.