• Home
  • About
    • About Me
    • Contact Me
  • Etsy Shop
  • Link Parties/Featured
    • I’ve Been Featured
    • Sweet Inspiration Link Party
  • Personal Diary

Vintage Southern Picks

Cheapskate Picker Sharing Finds, DIY & Selling Tips

Facebook   Twitter   Pinterest   Google+   RSS
  • DIY Projects
    • DIYs to Sell
    • Holiday/Seasonal
    • Home and Garden DIY
  • Home and Garden
    • Home Organization
    • How I Organize My Ebay/Etsy Home Office
    • Home Tours
    • Party Games
  • Selling Tips
    • Buys I Avoid
    • Shipping
    • What’s Selling on Etsy/Ebay
    • Yard Sales
      • How to Give a Yard Sale
      • What Not to Say in Yard Sale Ads
      • Yard Sale Humor
  • Vintage Finds
    • Thrift Store Finds
    • Mystery Items
    • Yard/Estate Sale Finds
    • Vintage Junk Giveaways
  • Disclosure Policy
  • Privacy Policy

How to Make a Shotgun Shell Christmas Garland

December 3, 2017 by Florence 48 Comments

It’s a Unique Garland!

I’m quite proud of this garland and am loving its final look, but it took a bit to get it there. That’s why I call it unique. I’m going to show you how to make a shotgun shell Christmas garland. Making it into a string of lights is not my original idea….I found it on Pinterest a while back.

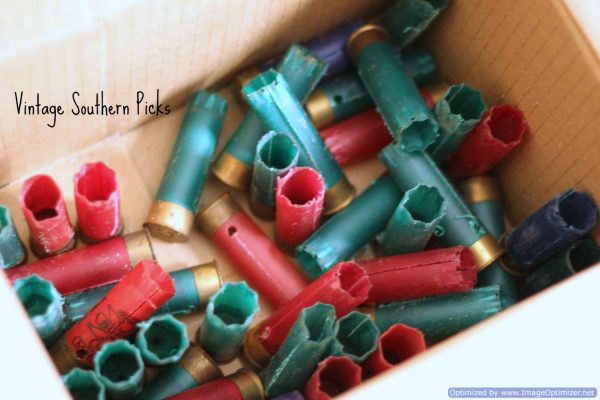
Hubby and I used to love to hike until bad knees and feet forced me to quit. The places we hiked were frequented by hunters, and target practice folks, so we often found the ground littered with shotgun shells. Way back when I thought they were pretty, but hadn’t a clue what to do with them. These didn’t come from hiking, but instead were found in an old barn at a run-down lake house estate sale. With their colored plastic tubes and metal bases, which I’ve seen made into jewelry, these are versatile bits of flotsam.

This is just a small part of the whole stash, but I began working with these.

shotgun-shell-lot

Ideas on Pinterest for Shotgun Shells~

Pinterest has many other ideas for shotgun shells such as boutonniere’s for a wedding, little flower vases, bracelets, coasters, and multitudes of ideas for the metal bases. I’ve seen them made into wreaths, but the idea I liked best was as a string of Christmas lights.

shotgun-shells-to-be-made-into-christmas-lights

The Assembly~

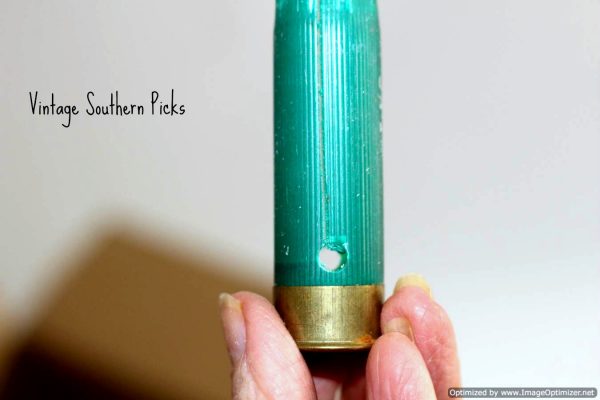
All we had to do was stamp 2 holes in the base of the shell, one on either side, followed by a slit made with razor blade or scissors. I needed 100 shells because the light string I had on hand had 100 bulbs. I ordered a string of LED lights from Amazon a while back, but you can use any string of lights you want and use the appropriate number of shotgun shells to equal it.

single-altered-shotgun-shell

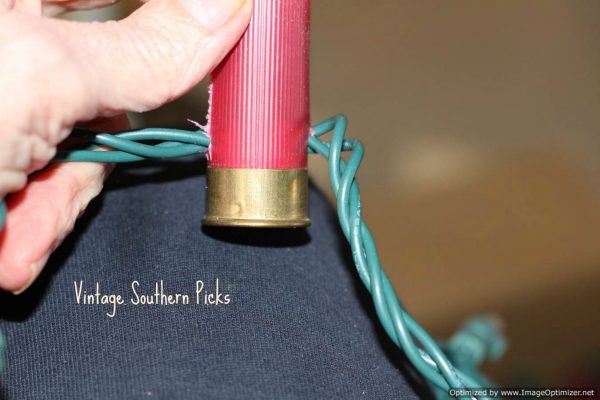
You take the wire, guiding each side of it by the bulb into the 2 slits, centering the bulb inside the shell while snapping it into the hole. This prevents the bulb from slipping out of the shell.

shotgun-shell-with-christmas-lightbulb

The most time-consuming part of the process was putting the holes and slits into each shell, (hubby’s job.) It’s possible you could use a “Crop-a-dile” punch, but I don’t have one, so can’t say for sure. He used his drill press.

Where to Display~

The second most time-consuming part of the job was putting it all together…each light bulb into a slit and into the holes, but once that was all done, the next big decision was where to display the unique garland.

the-finished-shotgun-shell-garland

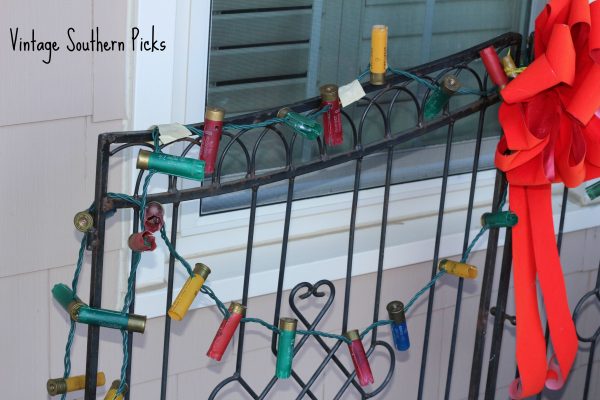
I thought it would look great out on my Christmas porch, mounted on a metal gate with red bow that I set up every year. The sleigh was a curbside find from last year…Curbside Find Completes the Christmas Porch.

It was hubby’s idea to bring the sleigh in front of the gate and string the long strand of lights around both pieces.
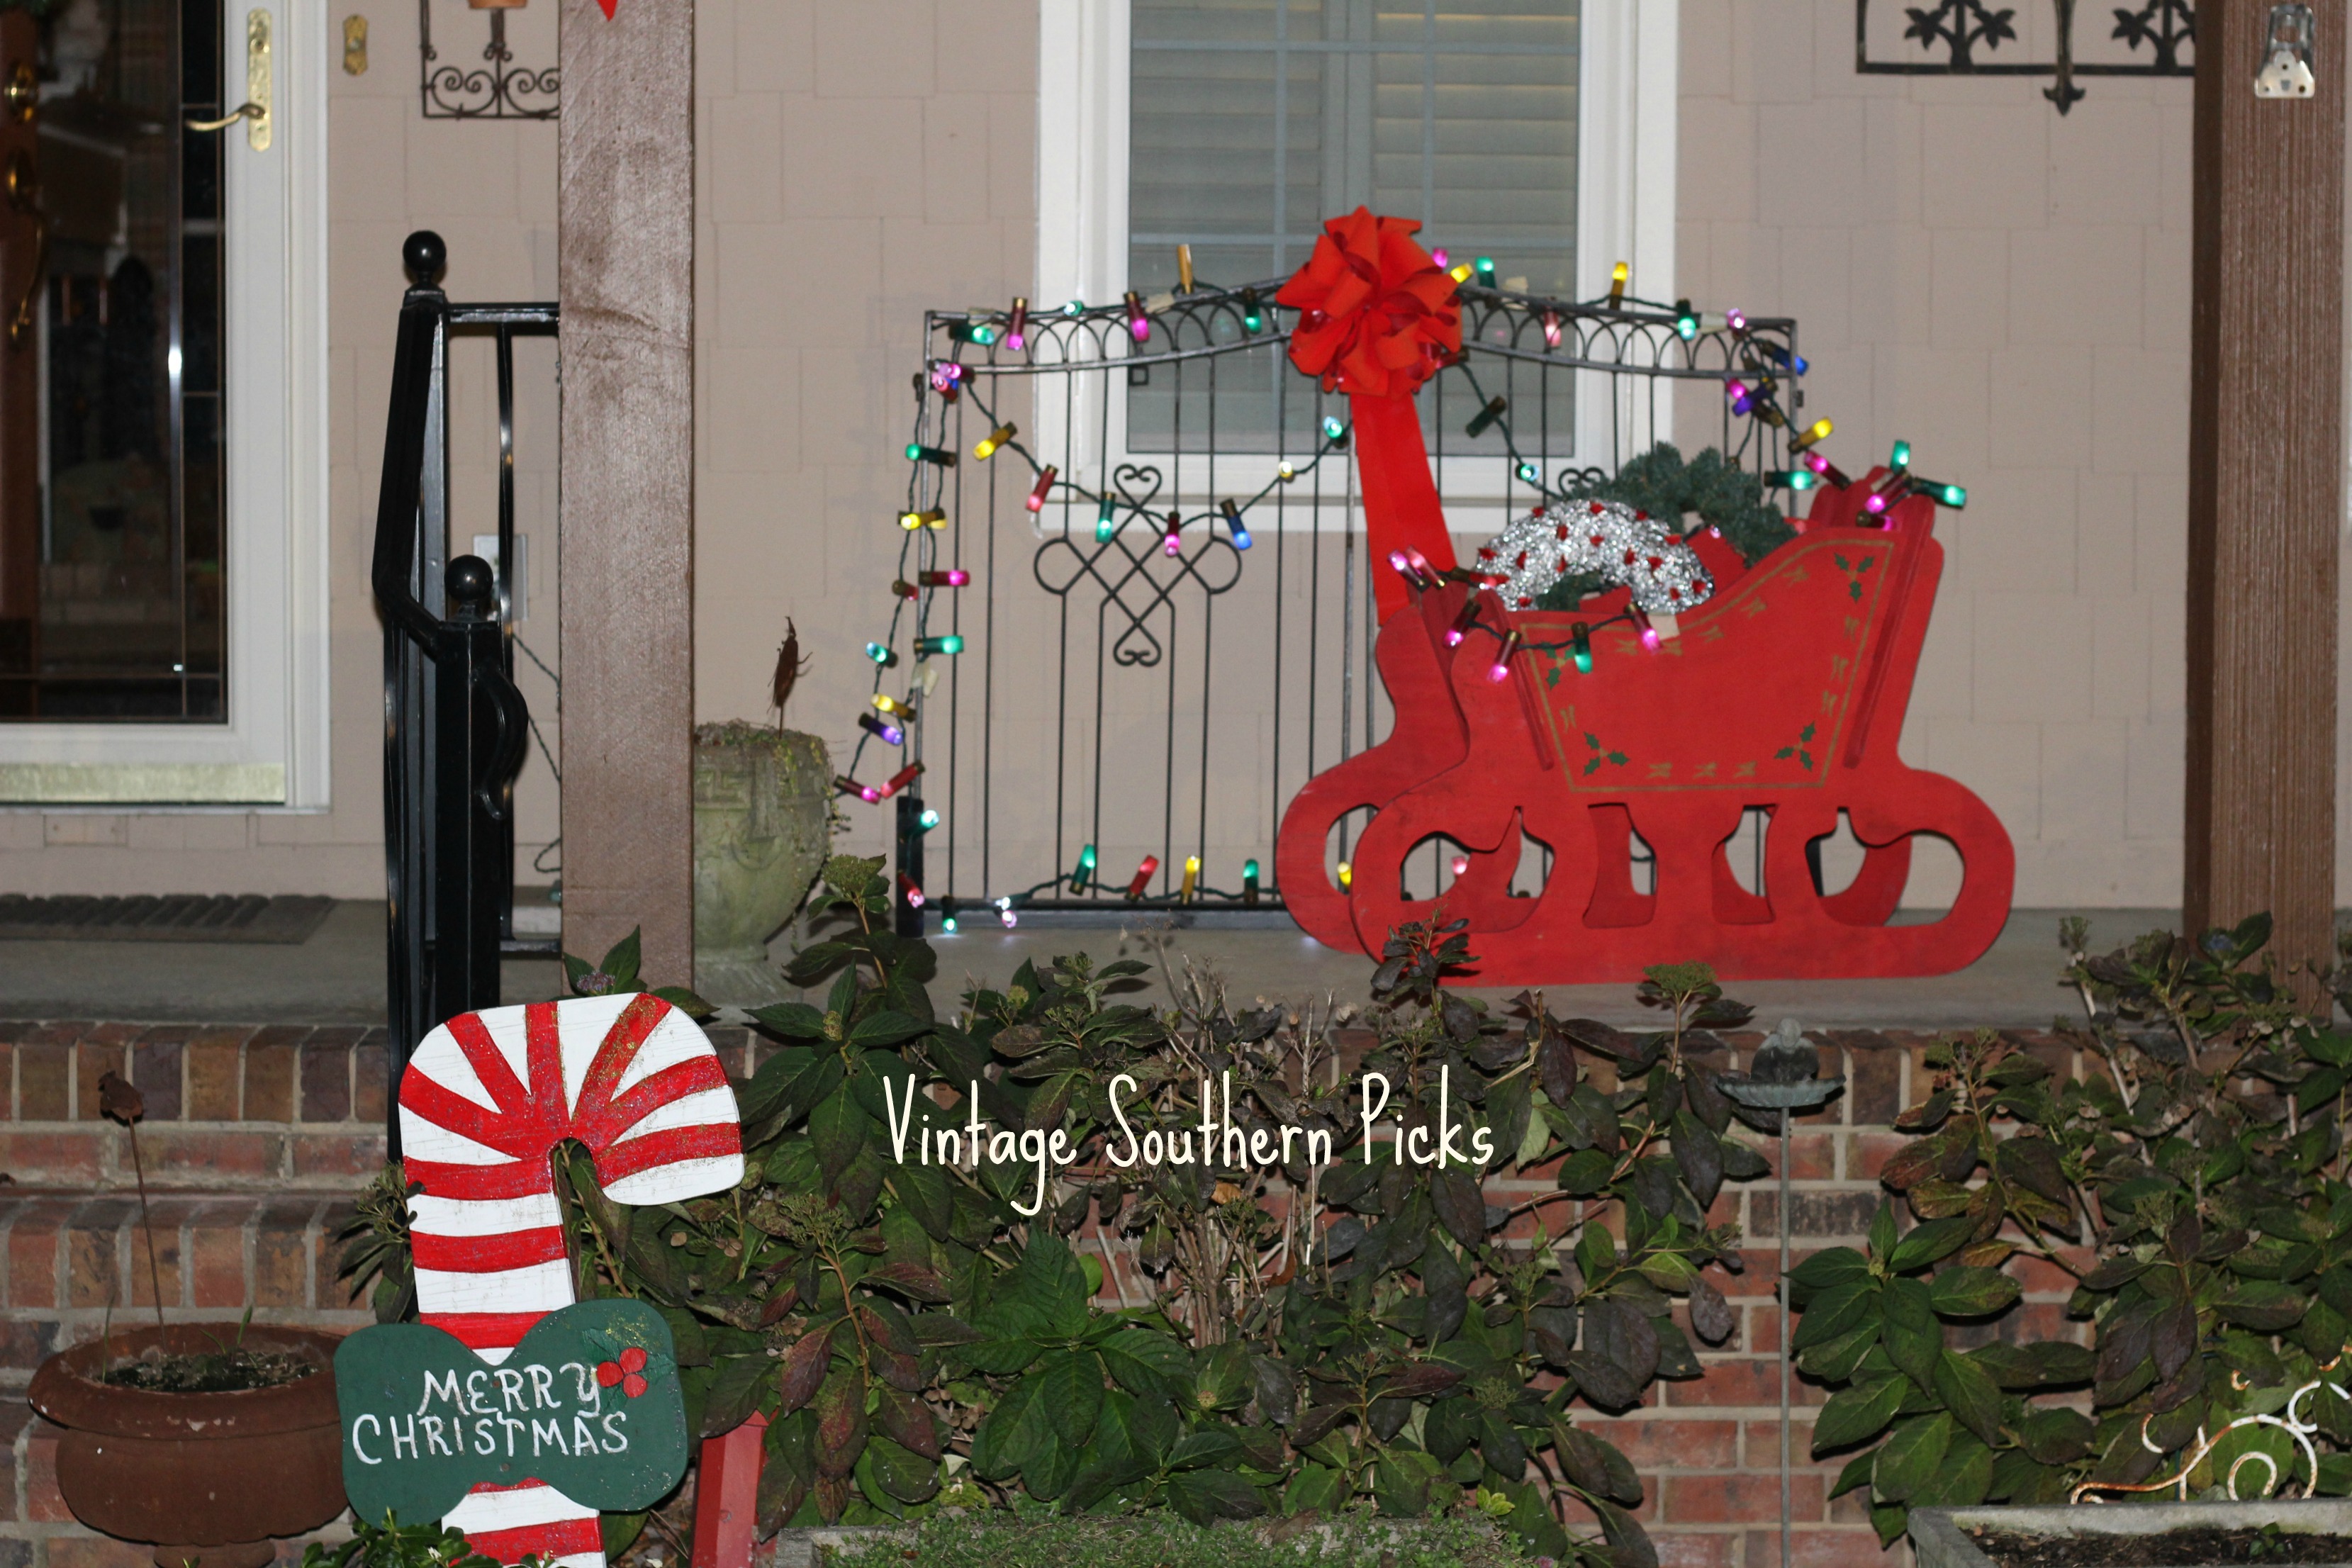
christmas-garland-lit-up-against-metal-gate

I hated it.

The red shotgun shells glow deep pink, which clashed with the red bow and the red sleigh. Plus it looked a little too bare.

What I wanted to do all along was display it somewhere inside. So I scrounged around in my Christmas decorations and came up with a length of faux pine garland. I had just enough to wind around the shotgun shell garland. I’m not sure how many feet long it is, but it’s LONG!

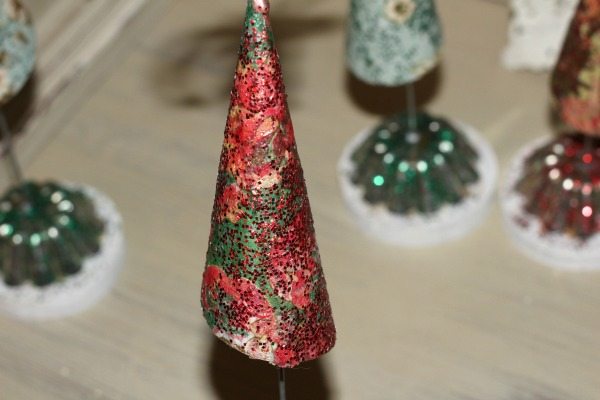
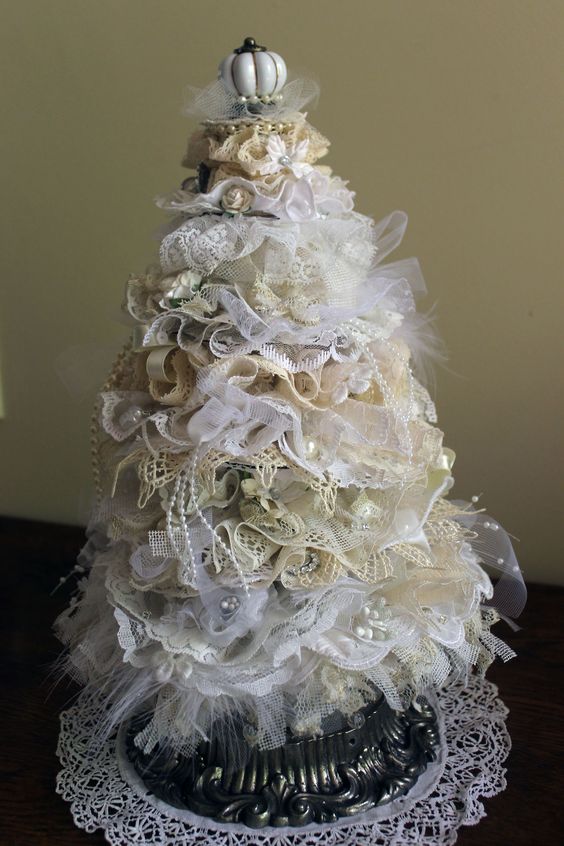
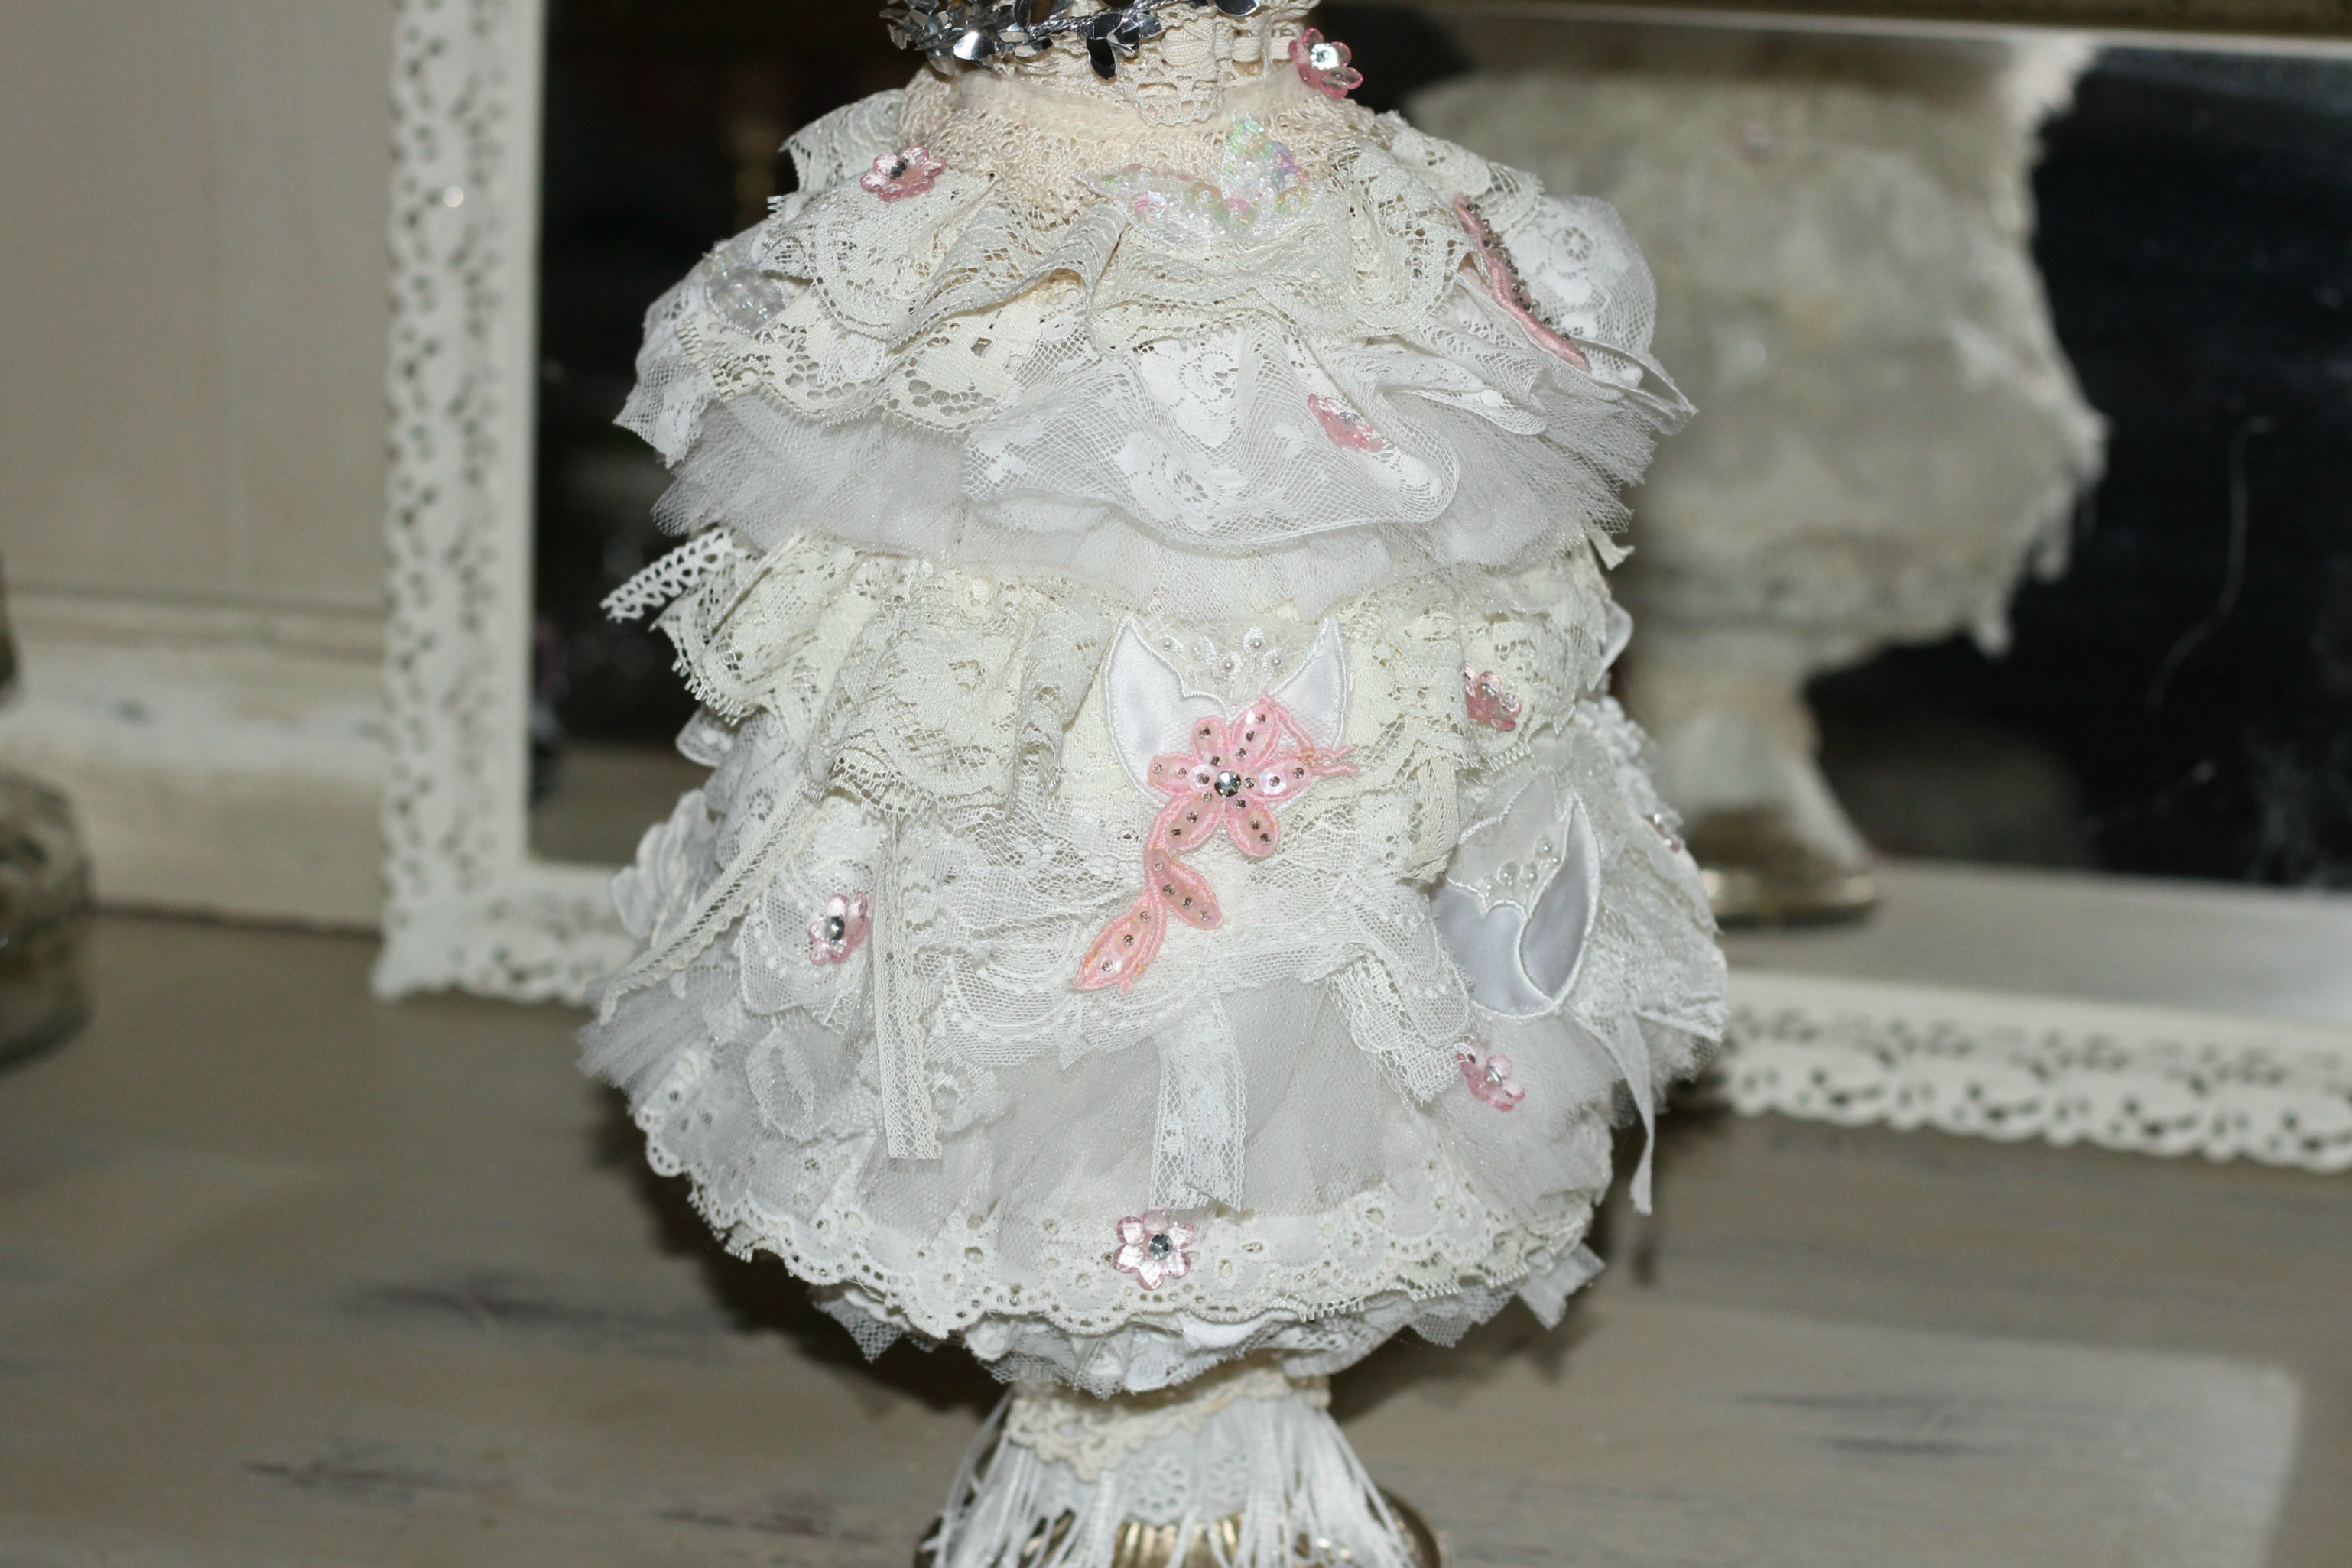
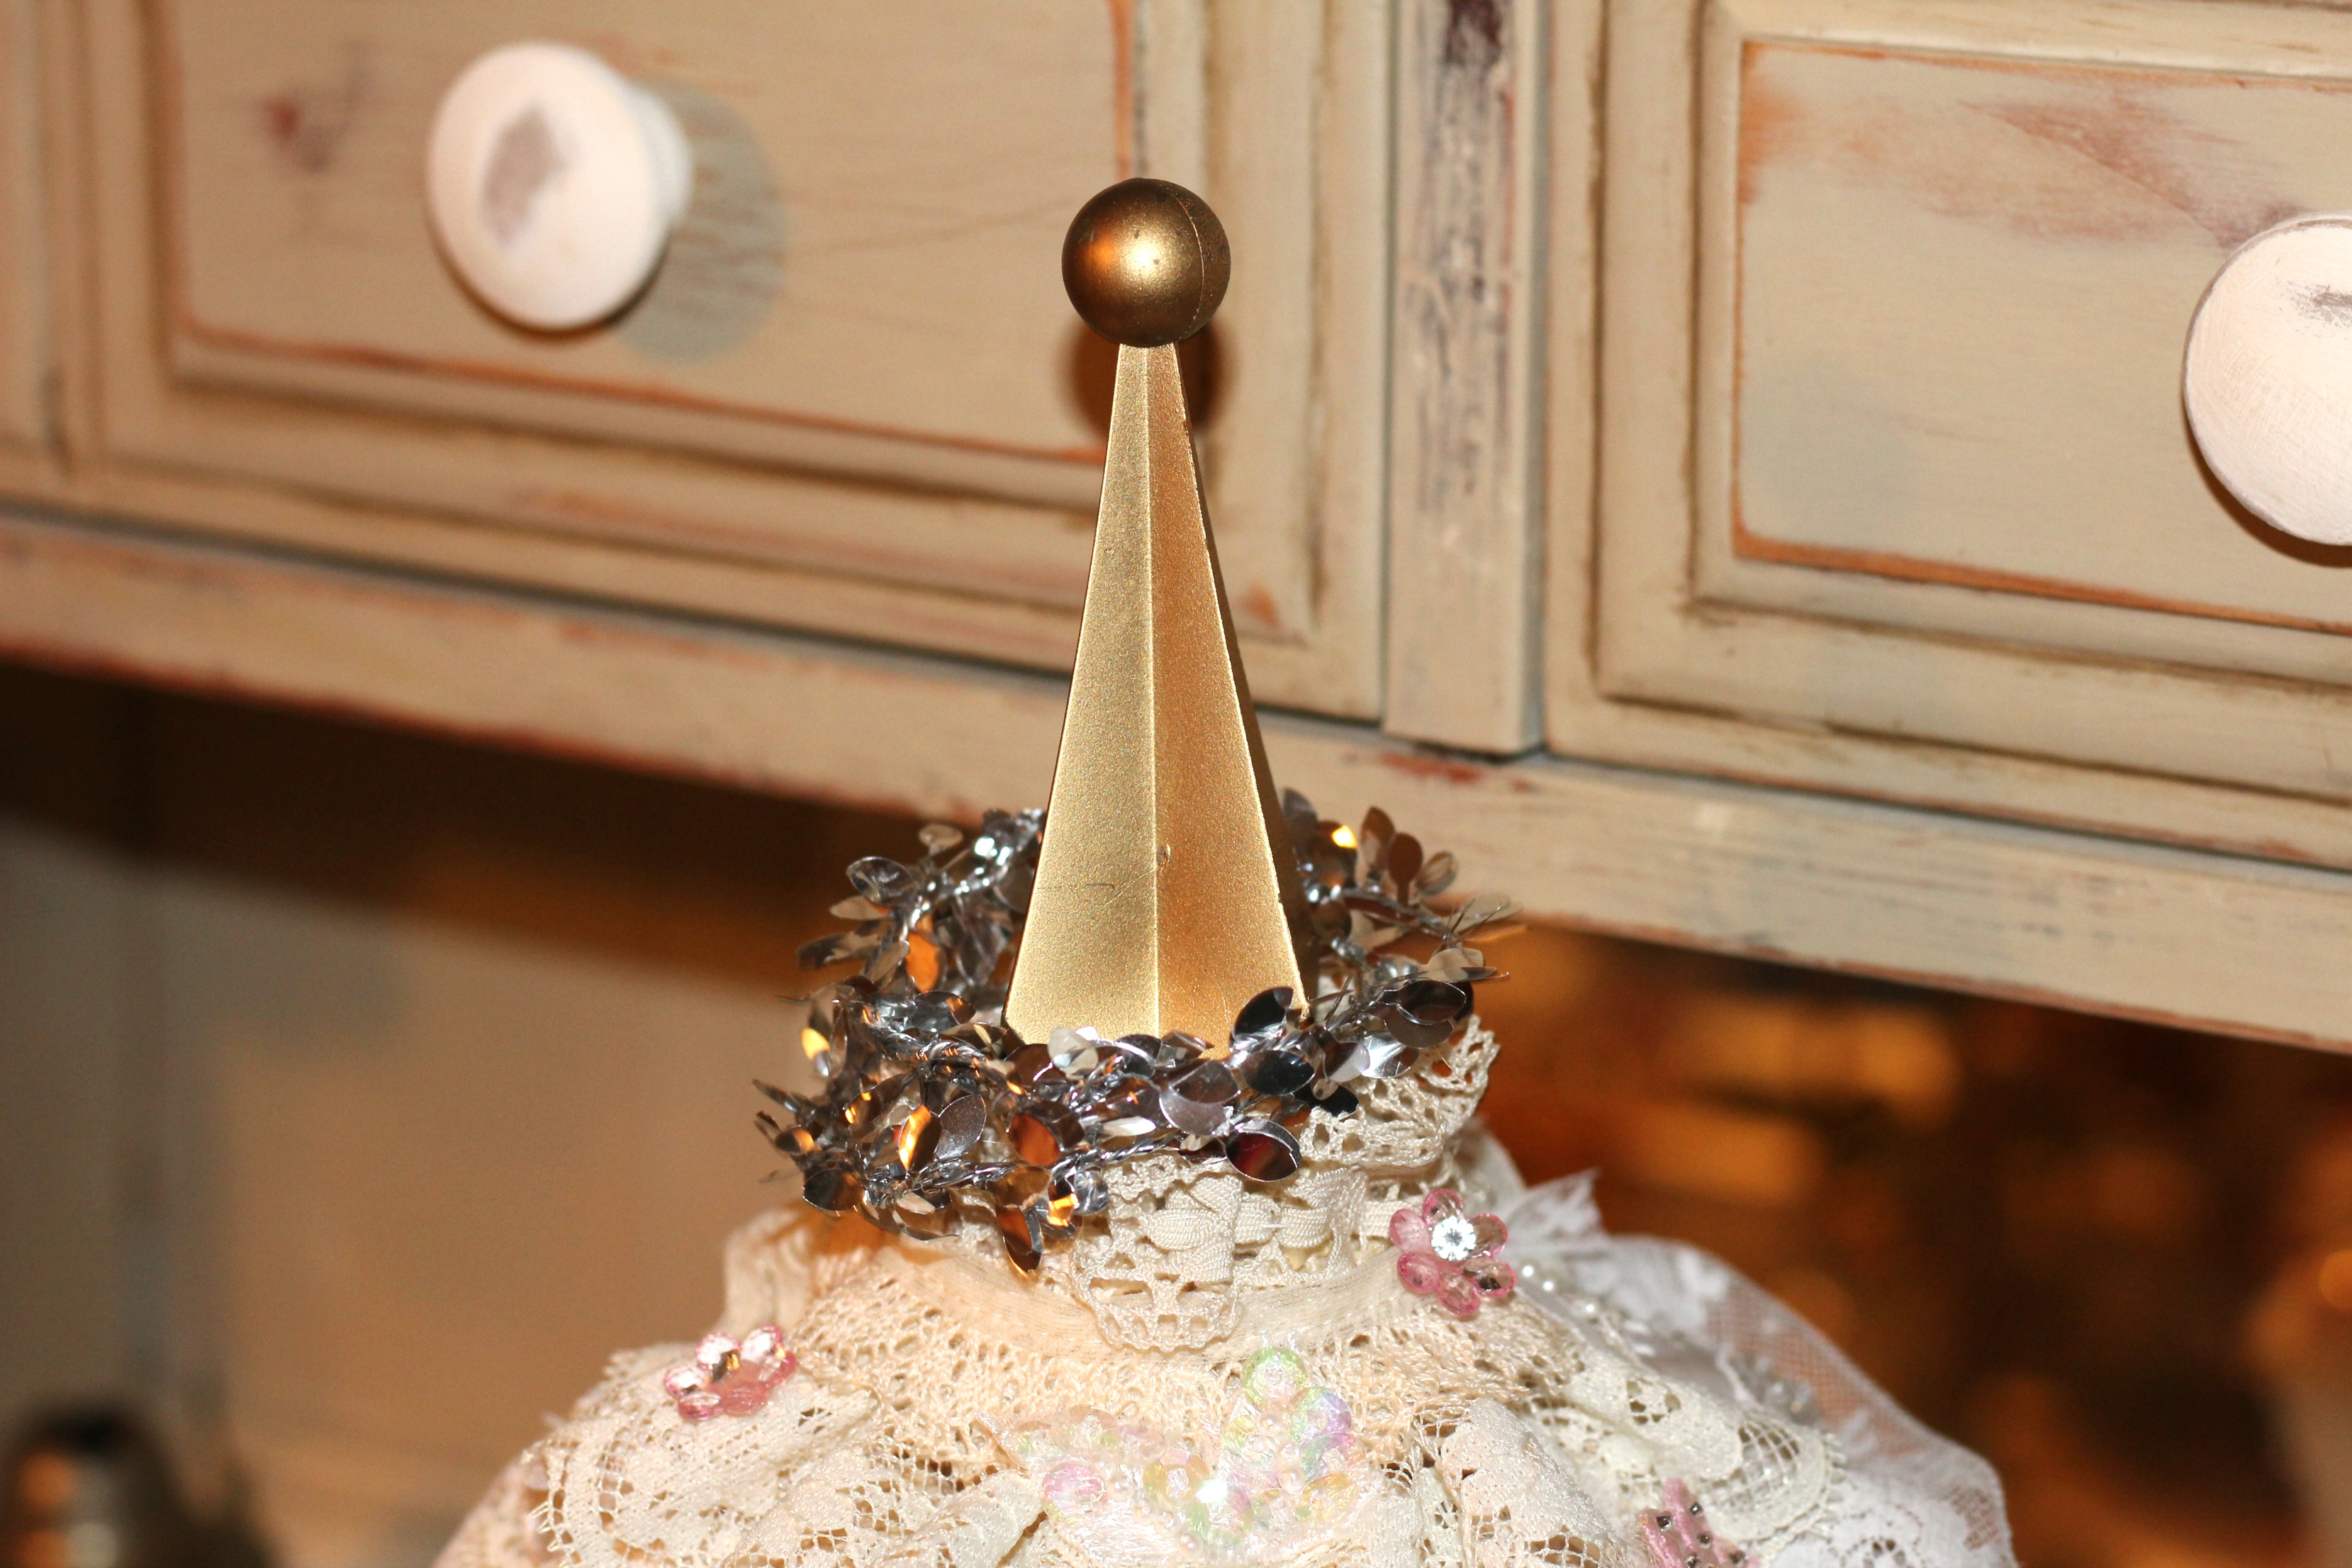
I wanted to put it on the mantle all along so here it is! Enhancing my DIY Shabby Chic Christmas Tree and my DIY Tabletop Christmas Trees made from Tart Tins and Icing Cones (which I found out later are not “icing cones,” but “cream horns.”) We won’t split hairs though.

shotgun-shell-christmas-garland


christmas-mantel-with-shotgun-shell-garland

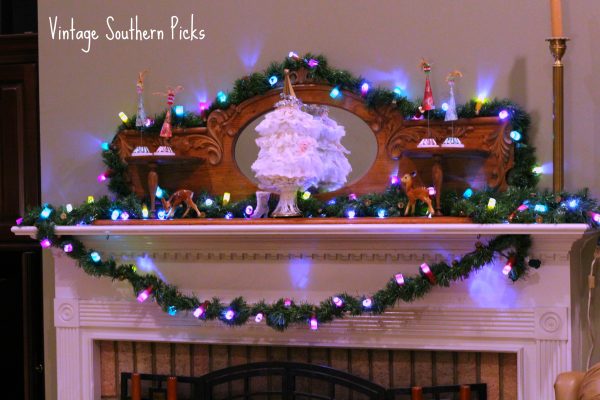
I’m really loving the look! It’s a big improvement to have the faux pine garland too, don’t you think?

shotgun-shell-garland-closeup

This is a keeper which I’ll be using every year, and I love that it’s made with LED lights, so low energy consumption, which is a plus.

What do you think?

Sharing with these Link Parties……

If you like the look, Amazon has them all put together!

{We are a participant in the Amazon Services LLC Associates Program, an affiliate advertising program designed to provide a means for us to earn fees by linking to Amazon.com and affiliated sites. Compensation from Amazon helps support this blog or may provide enough funds for me to buy a cup of coffee at Starbuck’s. But it won’t cost you a penny more}


Filed Under: Holiday/Seasonal Tagged With: christmas garland, repurpose shotgun shells, shotgun shell garland, shotgun shells

DIY Tabletop Christmas Trees Using Vintage Tart Tins and Icing Cones

November 20, 2017 by Florence 42 Comments

I enjoyed creating these DIY tabletop Christmas trees using vintage tart tins and icing cones. I had everything on hand, and most of what I used came from past estate sales. I saw the tart tins and icing cones in my stash one day many months ago, and thought what cute mini Christmas trees they would make with just a little modification, and hubby’s help.

My Beautiful Mini Tabletop Trees

mini-tabletop-christmas-trees-on-hutch

The Supplies

Of course, I forgot to get a photo of the tart tins and icing cones before I started, but here’s the rest of the supplies I used:

  • binder twine
  • red and green glitter
  • 2 paper napkin designs
  • pinwheel beads

mini-tabletop-christmas-tree-supplies

Basic Construction

I commissioned hubby to put the trees together for me. He soldered wire to the tart tins, which went up through the holes in the narrow end of the icing cones, leaving about 1-1/2″ of wire extending from the top. It wasn’t at all flexible, so I studied how to decorate it. I found the pinwheel beads at a recent estate sale. Luckily they fit over the wire, and provided nice color.

pinwheel-beads-used-to-decorate-the-top-of-the-tree

Decoupage Method

The icing cones easily took napkin decoupage using the accepted method:

  • separating a 3-ply napkin into the final one-ply with the design
  • Matte Mod Podge applied to icing cones first
  • Then the paper napkin was applied to that
  • As many of us know, it doesn’t work well to apply Mod Podge to the napkin, which too easily tears it.
the-decoupaged-icing-cone-with-glitter-applied-over-that
Glitter applied over the decoupage

I was pleased with how it looked, but a little glitter makes everything look more festive! And I took it a step further to glitter the tart tin bases.

the-glittered-tart-tin-bases

But Wait…There’s More to the Story

Now you really don’t know the whole story here. These look perfect now with their round wooden bases. I found out the hard way that my trees needed wooden bases. They were a bit top heavy, even with the lightweight addition of the pinwheel beads. One day recently, the worst happened. One of my trees fell over on the floor, which was open season as far as my DAWG, Leo was concerned. Yes, our one-year old was about to get in on the act.

leo-with-a-favorite-toy

Here’s our “angel” with one of his favorite toys…a thrifted stuffed animal that he killed a while back. I should mention that he has a basket FULL of toys, but no, he wants whatever I’ve got, whatever I’m working on. Hubby found him with my treasured tart tin mini Christmas tree on the floor that he was about to kill. Horrors!

Last Step

This is when we realized the trees needed bases. Tragedy avoided.

Here’s a final look at my beloved trees. I really like how they turned out.

mini-tabletop-christmas-trees

You don’t want to miss the rest…

And now, before you go, why not check out the inspired creations by my talented blogging buddies from the “Blogging 50” Facebook group? Yep, we’re living proof that it’s not just the young bloggers who have it all together! We’re an all female group of…ahem…mature….ladies, who have great ideas and lots of wisdom.

blogging-fifty-christmas-blog-hop-photo

The Creative Christmas Link Party is hosted by Janet of Shabbyfufu and the the bloggers of Blogging 50. Please visit all of the talented bloggers below!
An InLinkz Link-up


Sharing with these Link Parties….

Filed Under: Holiday/Seasonal Tagged With: christmas blog hop, christmas blogging fifty blog hop, christmas trees with vintage supplies, decoupage mini christmas trees, diy tabletop christmas trees, mini tabletop christmas trees with vintage tart tins and icing cones

Tabletop Shabby Christmas Tree with Vintage Lace and Bridal Trim

November 20, 2017 by Florence 35 Comments

I love me some shabby chic and you got it with this tabletop shabby Christmas Tree with vintage lace and bridal trim! Everything on the tree was made using vintage and household items. Now since I’m a picker and go to estate sales all the time, naturally I bought some of this stuff in the past, but nothing was bought specifically for this project. As a part of the “C’mon Get Crafty” Link up this month, we are allowed up to $10 for supplies if needed.

Inspiration hit when casually browsing Pinterest one night, and I saw the Shabby Chic lace tree of my dreams!! I fell totally in love. On to youtube where I watched a tutorial on how my vision was created. Now this isn’t my tree, but it was THE VISION. Here’s the link to this tree if you care to watch: https://www.youtube.com/watch?v=x9uYmZ4gDy4&t=1670s

Isn’t it gorgeous??

shabby-chic-lace-tree

Using her tutorial as a guide, I used:

  • A paper towel roll,
  • a toilet paper roll…fitted into the bottom of the paper towel roll, which gave it greater stability.
  • 3 cardboard discs of graduated sizes spaced  down the paper towel roll. This is to help keep the Christmas tree shape. I cut the round discs from scrap cardboard box, and eyeballed for size. This step doesn’t have to be perfect.

cardboard-roll-and-discs-for-christmas-tree-shape

cardboard-tree-form
In its Basic starting shape


Basic Construction

  • Glue white paper doilies onto the discs in order to hide the ugly cardboard. They can show through the tree. I had to piece all of mine on as I didn’t have any the correct size, but this will work just fine.paper-doilies-glued-onto-the-discs
  • Cut an opening in the discs large enough for the end of the toilet paper roll to pass through. I found it worked best to trace around the toilet paper roll, then add another 1/4″ and cut along this line.
  • Put all 3 discs (or however many you make) on the paper towel roll.
  • Glue them in place with hot glue.

Other Basic Construction Ideas…

  • You could also use a narrow piece of wood like a dowel or chopstick, stuck down into florist foam, and glued onto a base.
  • I also saw someone use an old perfume bottle as the base, all of which I thought were charming ideas.
I have a whole LOT of lace remnants, crochet trims, and bridal sparkly bits I bought long ago at an estate sale. Besides loving shabby chic, I have a ton of these on hand, so this was a perfect project for me.

What I Used:

  • Bits of gathered and non-gathered crochet trims
  • Bits of gathered and non-gathered lace trims
  • White tulle bits
  • White bridal trim
  • White bits of lacey skirt overlay
  • Pieces of a tulle shower curtain
  • Eyelet lace trim…all sizes
  • Bits of crochet ribbon
  • Bits of sparkly bridal trim
  • Moire strips

The Fun Part

  • Gather all your lace remnants
  • Girl, you just start a hot-gluing mad frenzy!
  • Have needle and thread on hand to add gathers to lace and re-gather others. Some of my lace was flat and some needed a bit more gathering love.
  • After all your lace is on, discs hidden, and tree shaped to your satisfaction, it’s time to decorate the tree with whatever bits and bobs you have on hand. (I had pink rhinestone buttons and pink rhinestone flower shapes from bridal trims.)
  • I loved her use of tiny pearls to decorate with, but I didn’t have those. I used what I had on hand.
It took me a whole week to do, working on it as I had time. I’m sure it’ll be quicker next time, so don’t let this deter you from doing your own tree. Mine is a little different from the vision above. But I LOVE it. See what you think.
 
lace-tree-close-up

topper-for-lace-tree


Lace-tree-on-the-hutch

What I Used for the Base

  • I used a vintage metal lamp part with a threaded rod attached as the stand on which the whole thing rests. Then stuffed a plastic bag inside, wrapped around the rod so the tree would stand straight
  • If I hadn’t had that, I would have used a chipped crystal bowl, gluing the cardboard roll into the bottom.

What I Used for the Topper

  • The topper was an odd piece I found at an estate sale recently. I keep odd pieces of things around.
  • I found 2 sparkly tinsel napkin rings in my Christmas stash, which I added to the top.
  • You could use a cabinet knob as shown in top photo
  • Mine are large enough to rest on top with no added gluing.

What do you think of the Shabby Chic Christmas tree?

Now be sure to visit all the other fabulous bloggers below, who have more inspiration to share…


Every month a group of bloggers are challenged by C’mon Get Crafty to create a new craft or project from their own stash of goodies! Check out some awesome creations you might be able to make from your own stash! #CraftRoomDestashChallenge
craft-room-destash-challenge

[clickToTweet tweet=”What crafty creations could you make today from YOUR craft stash?! #CraftRoomDestashChallenge” quote=”What crafty creations could you make today from YOUR craft stash?! #CraftRoomDestashChallenge”]

If you’d like to join in the Craft Room De-Stash Challenge, you can request to join our Facebook group here!

INLINKZ:

An InLinkz Link-up


Sharing with these Link Parties…..

Filed Under: Holiday/Seasonal Tagged With: c'mon get crafty blog hop, lace christmas tree, shabby chic, shabby chic tabletop christmas tree, shabby christmas tree

Last Minute Halloween Porch Boo Decor

October 29, 2017 by Florence 6 Comments

Here’s my last minute Halloween Porch Boo Decor…we have Mr. Dreamboat/Farmer John on the porch waiting for trick-or-treaters. He decided he wanted to be a little scarier, so he donned a mask even though it doesn’t fit him very well. If you missed it, here’s how Mr. Dreamboat/Farmer John came to be. 

dummy-man-halloween-porch-decor-in-a-mask


I believe the mask makes him look a little ill, don’t you? And he needs to lose a few pounds, but even as laid back as he is, we know better than to discuss that topic.


halloween-porch-decor-with-hay-bales-ghosties-black-cat-and-pumpkins

There are my 2 bales of hay, my pumpkins and here are my 3 little “ghosties,” made from blocks of wood, painted white, with free-hand painted eyes and mouth. I got that idea from something I saw on Pinterest last year, but wasn’t able to do until this year because of this. 

3-little-ghosties

Did you notice the black cat? That’s “Elmer,” with one eye. We found each other at the thrift store a few days ago…

elmer-the-one-eyed-black-cat

But the real star of the show is the “Boo Sign,” which I made last year out of a piece of shingle left over from home building 20 years ago. A miracle it’s lasted through several purges. I used just one coat of Annie Sloan “Old White.”

piece of shingle to be made into a boo sign

And here it is!

nod to halloween

Finding my stash of letter stencils I bought long ago at a yard sale, I had a “B.” Unfortunately, the “O” was missing, so I grabbed a coaster and traced around it. I copied the cat from one of my favorite sweatshirts.

I’m pitiful in the drawing department, and after 3-4 attempts to draw a spider in the upper right, I finally gave up. I even watched a youtube video on how to draw a spider. Let’s just say, the sign looks better without it!

A neighbor down the street who goes all out for Halloween decorating, actually has a replica of the skeleton grandma from Alfred Hitchcock’s “Psycho” sitting in a rocking chair in his front yard, so I got the idea for the Bates’ Motel from that.

So you know what my husband said? Florence, the kids aren’t going to know the significance of the “Bates Motel.” And I’m like…the kids aren’t going to CARE…they’re just after the Halloween candy. It’s not like they’re going to stand there analyzing my decor. Right? My sweet man!

halloween-be-safe-banner

What do you think of the last minute Halloween Porch “Boo” decor?? 

Sharing with these link parties…


Filed Under: Holiday/Seasonal Tagged With: boo decor, boo sign, halloween, halloween diy, halloween porch, halloween sign

Found Forgotten Junk Makes a Sweet Vintage Vignette

October 26, 2017 by Florence 49 Comments

Today I’m joining with “Thrift Store Upcycle,” a favorite group of like-minded bloggers! Together we repurpose something “new” once a month using a thrifted find, but of course, it doesn’t have to be a thrift store find. It can be anything really…an estate sale find, a yard sale treasure, or even a curbside find. I absolutely love mine which is a combination of curbside find, shopping my house, and an estate sale find. Found forgotten junk makes a sweet vintage vignette! I enjoyed putting this together and I hope you’ll like it too! There’s no limit on how much we spend. My whole vignette cost only $1.00.


Thrift Store Decor Upcycle Challenge

The Rules:

  • Upcycle an item(s) from a thrift store, resale store, or garage sale into a new piece of decor.
  • There’s no monthly theme.
  • There’s no budget to stick to.

Meet the Hosts

Amanda | Domestically Creative Michelle | Our Crafty Mom
Vicki and Jennifer | 2 Bees in a Pod Pili | My Sweet Things
Angela | Simply Beautiful by Angela Kim | Made in a Day
Lindsay | Crazy Organized Marie | DIY Adulation Ann | Duct Tape and Denim
Denise | My Thrifty House Jeanie | Create and Babble Debra | Shoppe No. 5
Shirley | Intelligent Domestications Victoria | Dazzle While Frazzled Lora | Craftivity Designs
Maureen | Red Cottage Chronicles Jeanee | Centsably Creative
Florence | Vintage Southern Picks Deborah | Salvage Sister & Mister

Make sure you follow our board on Pinterest for more upcycled decor inspiration!


I found a pile of old snapshots at an estate sale last weekend, so picking out my favorites from that became a part of the vignette.

Pile of Old Snapshots
Old Snapshots from the 40’s-50’s Era

Others are personal photos from a vintage album my mother put together for my brother and me, and one is a vintage cabinet card. I’ll explain more as we go along. 

I love using unusual vintage objects to display photos! Here are a couple of unlikely junky, rusty pieces that make up the “found forgotten junk,” which you can see above too.

rusty-vintage-junk
Found Forgotten Junk


You’ll never believe where I found these unlikely pieces! The soap dish is from the estate sale, and isn’t a part of the vignette. The other two pieces came from an automotive storage yard. I have no idea what they were. Because the grate is made out of soft metal, it was pliable and easy to bend into shape. I fashioned the metal plate on the vice to form a photo prop. Then I simply glued it to the grate with E6000. It worked even though there wasn’t much surface area for the 2 pieces to join. The vintage metal clamp was in my stash, and the rose at the top is a bit of jewelry scrap, which also came from an estate sale. It now makes the perfect little easel to display vintage photos!


junk-frame-easel


Here is the final look! I’ll show the individual parts below.


vintage-photo-vignette

You see vintage wooden sewing spools are holding the 2 photos on the left.

You can also see part of my vintage brooch collection.

Who are those people on the left?


people-in-the-left-of-the-old-photo

My Mother at 8 yrs old in 1918

my-mother-at-8-years-old-in-1918

And me at 8 yrs old! You can see how tall I was! I’m wearing a Halloween costume my Mother made for me (which I didn’t appreciate at the time because I looked vastly different from all the other kids.)

I used to get dirty looks from parents whose homes I went to for trick-or-treating with my friends.

Years later I understood why.

Me-at-8-yrs-old


Here is “The Couple.”

One of my favorite photos from the estate sale.

Are they at a prom? A sock hop? Church?


the-mysterious-couple
The Couple

I’ve seen photo displays in glass jars. Here I’m using a glass chimney from an oil lantern. 

glass-chimney-photo-display


Displaying 2 more favorite photo finds from the estate sale….

I call her “Wistful”


i-call-her-wistful-old-photo


And “The Babies” look like they’re in their Easter finery.

Look at that boy’s expression!

I’m not sure he trusts the photographer!


the-babies-vintage-photo


And a final way to use the Found Forgotten Junk Easel…

found-forgotten-junk-easel


…is with this vintage cabinet card 


display-a-vintage-cabinet-card


Hope you’ve enjoyed the sweet vintage vignette! I’ve enjoyed showing it to you! 

More projects below!


And now for more thrifty goodness!

Check out what my fellow upcyclers created below!

An InLinkz Link-up


—


Filed Under: Home and Garden DIY Tagged With: displaying old photos, DIY photo stands, remade junk, using junk to display old photos

  • « Previous Page
  • 1
  • 2
  • 3
  • 4
  • 5
  • …
  • 9
  • Next Page »

I’ve Been Featured…

ive-been-featured-link-party-buttons
oh-my-heartsie-girl-wonderful-wednesday-button
snickerdoodle-button

Beezer…Over the Rainbow Bridge 2017

Vintage Southern Picks on Etsy

Vintage Southern Picks on Etsy

Everything Square Dance & Western on Etsy

Everything Square Dance & Western on Etsy

© 2017 Vintage Southern Picks | All Rights Reserved

Disclosure: Some of the links on this website may be affiliate links. When you make a purchase from these links, I earn a small commission.