Life Got in the Way, and Here’s My Excuse…
I wanted to say a big welcome to all my new subscribers!! I normally post once a week, but I couldn’t get it together last week. Too much going on with us deciding to seriously downsize our house, and do all those home repairs you sort of live with for years, but don’t see anymore…you know the ones I mean! Then thinking about what we need to get rid of in an estate sale for moving in the near future.
Add to that minor surgery, looking for a new set of wheels, getting a speeding ticket (oops), scheduling a 4-hour driving school, and then being called for jury duty too (and I haven’t even been yet)…well, you can see why I didn’t have time to finish my post last week. Excuses, excuses…
I spend too much time sitting around thinking about what I need to do, but not actually doing it. Tell me I’m not the only one! That’s life. On to the post!
The Project
I’ve been working here and there on this project over the last several weeks. I found an old drum table at an estate sale a couple of years ago, and finally decided how I wanted to finish it. You’ll see that in another post.
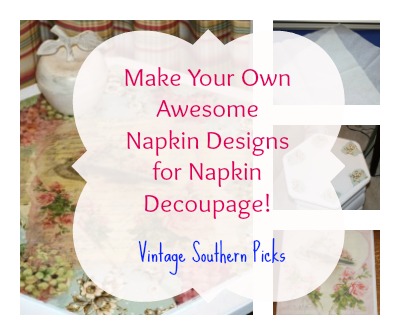
In this post, I’m discussing how I finished the top with decoupage. I discovered how to Make Your Own Awesome Napkin Designs for Napkin Decoupage! As this is my 4th project, it’s a good bet to say I love it! Glass candle holders, old toolbox/jewelry chest that was a super DIY headache, and Jewelry Box Makeover have all been my guinea pigs as I learn the craft.
I’ve found pretty napkins at yard sales, estate sales, Etsy, and Amazon, and I like all of them. But when I want a change, or a new design, I can’t find what I’m looking for.
This is where my idea was born…why not create my own design by printing on a napkin?
I’ll tell you how I did it.
The table is going in front of these curtains, so the design had to complement the curtains. (And let’s hope it goes with the curtains in whatever garden home is in our future.)

Where to Find Images to Decoupage
Next I scoured The Graphics Fairy and Pinterest for vintage images I liked that had those colors.
I settled on these. Shabby Chic style is my game. I LOVE it! It’s not the farmhouse look that’s insanely popular, but lest you think Shabby Chic is dead, just take a tour on Pinterest. You’ll see it’s not.

How to Get the Design onto the Table was the Next Decision
Image transfers were out. For this project, I really wanted to do a collage, and didn’t want the table to come in contact with the amount of water necessary to complete an image transfer project.
I didn’t want to use traditional decoupage using layers of printer paper, so I leaned towards napkins, which are super thin.
An Idea was Born
Wonder if it would work to print my chosen image on the layers of napkin I peel off, I mused. If you’ve never done napkin decoupage, most decorative napkins are standard 3-ply, so in DIY projects, you’re using the top pretty layer. I’m using the 2 back layers I peeled off, saving them from the trash can.

Experiment with Other Types of Paper Besides Napkins
First I experimented using white packing paper that came in an Amazon shipment. It gave my image a nice crinkly effect, but that paper was thicker than regular printer paper…not what I wanted.
On to the napkin idea! I peeled off the back 2 layers, placing one thickness on top of a piece of printer paper. To keep it aligned, I taped the borders down with scotch tape, then cut off the excess.

What to Consider Before Running a Napkin Through Your Printer
I doubt it would work to run a thin layer of napkin through a printer by itself. A 1-ply napkin layer is much too fragile and I didn’t want to chance it. I secured the napkin to a piece of printer paper first, but I wasn’t sure it would work.
I thought about using adhesive spray to adhere the napkin to the paper, but I was afraid I would have trouble getting the napkin to come off in one piece.
Do the pieces of tape interfere with the design? For me it didn’t. I either tore around them or let them stay. It will totally depend on your design and what you want to accomplish. It will hardly be noticed after applying the final sealing Mod Podge layer to the top.
Fingers crossed, I ran the job. Success! The design came out almost perfectly! It was a little wrinkly, but I ironed it (no steam setting). Ironing isn’t necessary, but I prefer it because it helps to smooth out the paper.

My first piece had a distortion at the top, but I’m leaving it. If it bothers me later on, I can always cover it with another piece of napkin. That’s one of the great things about decoupage. Make a mistake…just cover it up, and napkin layers are so thin, it’s not a problem!

Here’s the next image printed on the other napkin ply…Perfect!

The Procedure
I used these napkins because they complement the curtains and I have a lot of them.

When choosing pieces of the design to use, here’s an easy way to cut it out so all the edges look nicely feathered allowing them to blend into the design.
Go around the piece with a wet brush or Q-Tip.

Gently tear along the wet line, which makes them look uneven…the look I was going for.

The drum table is hexagonal (6-sided), so I spaced out pieces of the napkins evenly around it.

I cut out pieces of the hydrangea blossoms to go in between.
The piece in the center is one sheet of French script, torn in half to be seen around what’s placed on top.

More Decoupage Gluing Tips
To avoid tearing the napkin when gluing, never slide your finger across it. Instead “pounce” your finger on top. That helps flatten napkin nubbies too. Nubbies are the little bumps on the edges of napkins.

When working with larger pieces, like the French script, place a sheet of Saran wrap on top and gently scrape across it with a credit card. This helps remove air bubbles while smoothing it out.

I accidentally discovered an extra sheet of script on top helped eliminate a developing problem.

Because of the sheerness of the 1-ply napkin, I feared the final picture for the top would look funny placed on top of that whitish center, but this sheet of yellowish script helps fill in while adding to the look of the final image!
Here’s the final voila! I’m absolutely thrilled with how it turned out!

It’s not perfect, but I love it. After all the hoopla of getting it to match the curtains, I rearranged furniture and moved it, ha ha. What do you think? Would you attempt to make your own designs?
FYI…I used the backing layers of 4 dinner size napkins for this project.
Sharing with these link parties….
If you’re panting for more Napkin Decoupage Projects…


Florence
Latest posts by Florence (see all)
- The Latest Vintage Hauls - February 10, 2020
- A Vintage Fall Haul - November 3, 2019
- September Sales on Etsy and My New Antique Booth - September 30, 2019
- Camping Trip Thrift Store Haul - August 2, 2019
Wow, sounds like you have a lot on your plate at the moment! So, where are you planning to move? Somewhere close by or further away?
The napkin table turned out really pretty!
Tania
Thanks Tania! I appreciate it. We will be moving locally…probably not too far away…just need a smaller house and yard to take care of.
What a great tutorial, Florence–and one I haven’t seen before! Your table turned out lovely!
Thank you so much Cecilia!
You’re welcome & thank you for sharing your clever idea at Vintage Charm!
Love this project… I will definitely try it. There are so many beautiful napkins out there to choose from but sometimes you have something in particular. I never thought of doing this ..thanks souch for sharing
Thanks Sandy. I appreciate the thoughtful comment.
Love that word “Nubbies”. I didn’t know that’s what they’re called and now I just want to say it the whole time 😀 Love how your table turned out too Florence. I would never have thought of printing my own design onto a napkin. That opens up so many possibilities
Thanks Michelle. Hope you can use my idea!
You are super crafty and I am so happy you shared this. I have wanted to try this for a while, but never ever thought it would work. Now I am going to do it for sure!! Thanks so much!! And sounds like you need to take a breather! Hope you get a chance to rest…
Thanks Kim! I’m glad you came away with something you can use. Thanks for the kind words on me resting. I appreciate it.
It sure looks beautiful! Did you use an ink jet printer? It seems like the colors would run when you add the Mod Podge? I usually have my images printed using a laser jet printer.
Hi Lauren!
I believe I’ve learned the secret of colors not running when using images from an inkjet printer, which is not using them fresh off the press. If you wait a day or two, the colors have time to set. I had absolutely no problem at all with colors running.
Very pretty! I have been wanting to do some decoupage! thanks for the inspiration.
Maria
Thanks Maria! I appreciate it!
We’re getting ready to do the same hopefully next summer. I hope you’re recovering well from your surgery. I love how you decoupaged this table, Florence! I pinned this to my decoupage tips board because this post is loaded with helpful tips. I’ve never tried printing on a napkin ply before but you can bet I’m going to give this a try! Makes me happy that the extra ply can be put to good use.
Thanks Marie! I appreciate your comment & hope you do try it!
I didn’t know you could make your own napkin art! Very clever!!!
Thanks Julie! Yes you can!
Beautiful project, Florence! Love the colors in the napkins with the fabric behind tyhe table. Great job on the tutorial. I’ll get you stumbled and pinned. XOXO ~~ Susie from The Chelsea Project
Thank you Susie! I appreciate the sharing!
Florence I am very impressed with your technique. I never would have tried to print napkin paper but it just goes to show that if you don’t try you will never know. Well done, and I love how it turned out. Very shabby chic! Even if you did move the table. Haha!!
Thanks Mary. I appreciate the comment. Maybe you’ll give it a try one of these days.
I love our local Christmas Tree Shop for great napkins, especially florals. I had never heard of printing on tissue and I appreciate your sharing the techniques. I love shabby chic/romantic so this would be a great project.
To me, nubbies are those annoying little balls that happen on sweaters and cotton/poly tops that resist a clothes brush and the lint roller! Love hearing other people using original words caz I’ve spent years being laughed at for using mine! Hope life gets a little simpler for you–fast!
You know, never thought of looking in a Christmas shop for napkins. Great idea! I hope you do try it Kathy. It was surprisingly easy to do. Interesting about the turn of phrase on “nubbies.” I love words.
Florence, This turned out great! I’ve heard of using napkins, but have never tried it. Your tutorial was great. I would say you had one bad and busy week and hopefully things will start getting better. Downsizing is harder than one can imagine! Have a wonderful weekend, my friend!
Thanks for coming by to comment Carol! Hope you do give this a try. I dread the whole process of downsizing & moving! I’m tired just thinking about it, but I know it’ll be worth it in the end, isn’t it??
This is a fabulous idea and so beautiful. I will be referring to your tutorial when I give this a try. You really explained it so well.
Thanks so much for your comment Debra! Let me know how it turns out!
Figuring out what to dispose of and what not to is difficult job, heart rending sometimes. Ours was out of necessity when we bought our place here in western CO.
Due to very high prices for real estate here in Grand Junction area we had to do some hard accepting of not being able to have what we’d had in previous two places we’d lived. Plus for 2 yrs. or more we were still paying for house/land/insurance in KY while paying to live here, ouch.
We ended up buying a single wide mfg. home with half acre out in rural area few miles west of G.J. After what we had in KY the price was outrageous to us. I still miss our wonderful home and 1 1/2 acres out in country in KY but the climate was very hard on me health wise so after 5 yrs. there we packed up and came here as our two youngest kids live here. The climate here is much better for me.
For over 2 yrs. our furniture was stored til we could buy our own place. Had to get rid of so much as this place just wasn’t big enuf. Wish had waited on a few great pieces but it was done.
Sounds like you have been overwhelmed lately especially, hope all turns out ok. It is nice not to have to deal with too much. We’re both in later 70’s now and last thing I want to do is spend all my energy cleaning big house, don’t have to worry about that.
Good luck to you both.
Love your table with napkin decoupage, sure have inspired me. It’s wonderful and your tutorial is excellent, very helpful. Printed it all out for future reference. Never know what urge will attack me and off I go. Am very spontaneous crafter.
Wishing you Happy Mother’s Day
JaneEllen, I enjoyed reading your insights! I’m wondering what’s ahead for us too in going to a much smaller house. I know it’s hard to get rid of stuff, especially when it has any sentimental value at all. But sooner or later, it has to go. I sold 3 old postcard albums this week to a postcard dealer here in town. I hated to let them go, but I’ve got to start getting rid of things. I’m sure you had mixed feelings about your pieces too…glad in a way they’re gone, but wishing you could have them back. I totally know what you mean. But you have to do what’s right for your health, and it sounds like you made the right decision for you. I can imagine that CO has a much higher cost of living than KY. We’ve thought passingly of going out West to settle b/c of our allergies, but I don’t think we ever would. Tell me about cleaning a big house now! I had to quit doing that a couple of years ago. I couldn’t do it anymore, so we hired someone, and we have to hire our yard done. I’m a gardener, but can’t do it anymore either, so our yard guy does much more than mowing and the usual. Another reason why we need a smaller place. The 2 of us knocking around in this big old house…doesn’t make sense. Thanks for writing me!
It seems so difficult to me and I have to read again and again your excellent tutorial. You gave us some great tips Florence for decoupage. I love your drum table and you must be proud of your work!!! Well done my friend 🙂
Thank you so much Christina! I’m glad you like it!
Very cool! Thanks for sharing with us at the To grandma’s house we go link party!
Very clever Florence, and it turned out beautifully! I never would of thought to print on a napkin because their so fragile. I will have to give this a try next time I can’t find what I want. Great tutorial explaining the process.
Thank you Linda & especially thanks for dropping in to comment!
Florence!! You are a Woman after my own Heart!!! LOVE this!! the patterns used are spectacular and it looks lovely with the curtains!!! Thanks so much for sharing this great idea!! I too am no fan of the Farmhouse style….I am NOT into cows , pigs and sheep but i do like hens and roosters as they can be considered French Country!! And I am a color person and not into the monochromatic color themes of farmhouse…..
Thanks so much for taking the time to visit as I see you have had one busy time of it lately!! I truly appreciate it!!
Hugs,
Deb
Debbie, thank you so much!! Yes I believe we are kindred spirits. And yes I’ll be glad when Farmhouse fades into the background, LOL. Thanks for coming by. I’m trying to keep my head above water right now. Just do what I can.
Dear Florence, I’m sorry to see that you’ve had to stop hosting as part of Sweet Inspiration link party, but I know about having to move… As you know! 🙂 I have to say, this napkin idea of running it through the printer is BRILLIANT!!! Posted to FB, tweeted, pinned, and will probably work on a project because my printer is sitting around BORED… And I have that little black cabinet that our printer sits on and which is not really my color; it has been asking to be redone… 😉 Soooo many things can be done with lightweight napkins and decoupage. Love it!!!
Thank you for all the time you’ve spent with Mary, Christina, Michelle and the group at Sweet Inspiration. Your contributions will be missed!
Hugs and prayers for your health, downsizing and moving,
Barb <3
Barb, you’ve got the picture! I’m overwhelmed at the moment with the downsizing process & everything that goes with it. We’re deep in the throes of getting work done on the house and doing some of it so it’s ready to list. We’re a long way from that, but it’s coming. I just really didn’t have time for the link party right now, so decided to bow out for a while. You’re so sweet to come by and comment! You don’t know how much I appreciate that.
I’m so glad you like the napkin decoupage idea & how to print your own napkins! Good luck with your project ahead. Napkins are so pretty used for decoupage! I love the almost transparent look of them.
Hi Florence, you are so creative. Thanks for sharing your nice tutorial.
Thank you so much Merry! I appreciate your sweet comment!
love this idea thanks so much for sharing can’t wait to try
I’m glad Anne! Good luck with your project!